6. Troubleshooting#
This chapter explains the countermeasures when troubles occur.
6.1 Common procedure when a trouble occurs#
This section describes basic actions to take if you encounter problems with SpeeDBee Synapse.
-
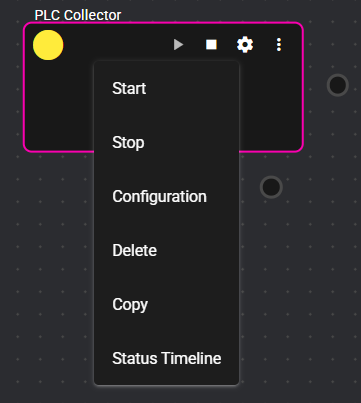
Right-click a component with a red-yellow status light.

-
Select “Status Timeline”.
-
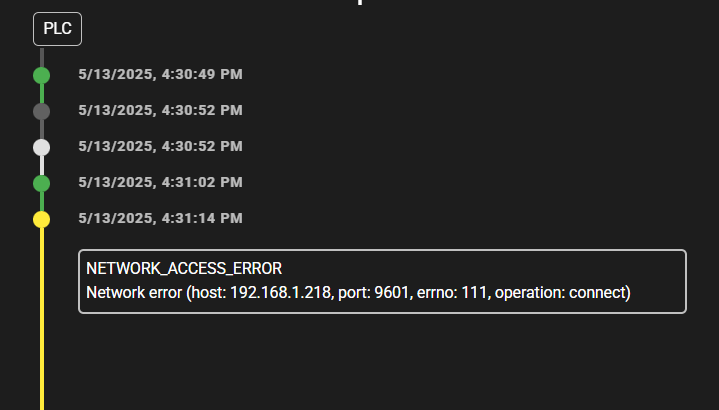
Check the error code displayed in the timeline.
-
Use the search box in the upper right of this manual to search for the error code displayed in the timeline.
-
Understand the error code overview and take corrective action.
-
If the error persists after taking the corrective action, contact the manufacturer referring to "Contact manufacturer."
6.2 Common troubles and their solutions#
This section explains the common troubles and the countermeasures for them.
6.2.1 Time Setting Problems and Workarounds#
If the time on your browser differs significantly from the machine on which SpeeDBee Synapse is running, the following warning appears at the top of the screen:
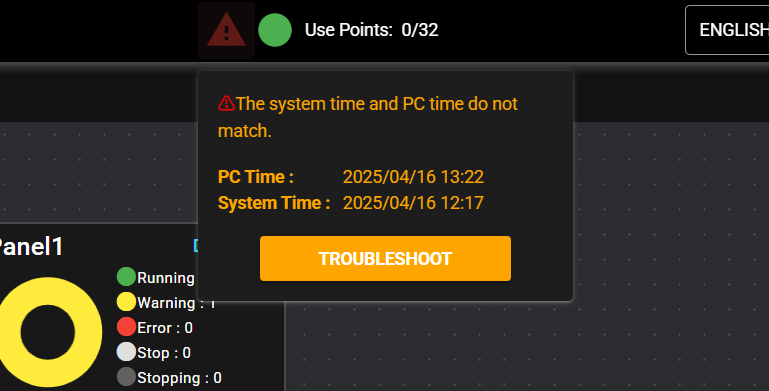
When this warning is displayed, SpeeDBee Synapse will fail during operation.
To avoid this, if there is a way to set the system time in the relevant environment, please align the settings with the PC time settings. For details, please refer to the manual for the relevant environment.
6.2.1.1 If SpeeDBee Synapse is running on Windows,#
follow the steps below to configure Windows time settings.
-
On the machine where SpeeDBee Synapse is running, stop Synapse. See here for how to stop running.
-
Right-click the date and time at the far right of the taskbar, and then click “Adjust Date and Time”.
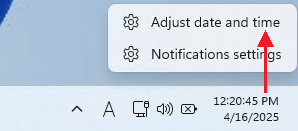
If the PC is connected to the Internet, proceed to the next step. If the PC is not connected to the Internet, proceed from step 4.
-
The “Date and Time” screen appears. If your PC is connected to the Internet, turn on “Set Time Automatically” and wait one minute. Then go to step 6.
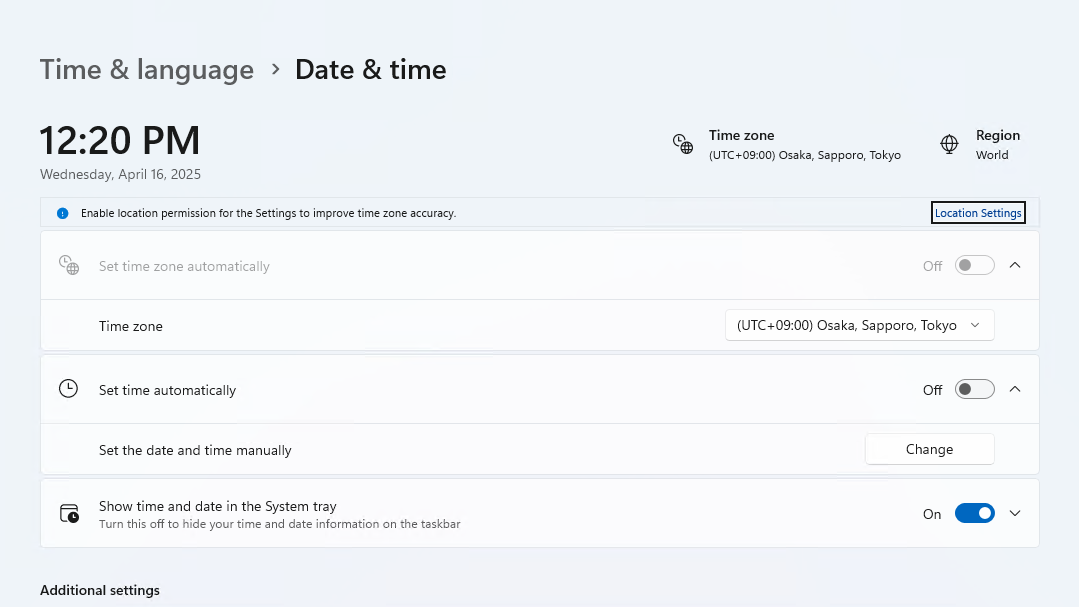
If automatic time synchronization does not work or does not solve the problem, or if your PC is not connected to the Internet, you may need to set the time manually. Then go to the next step.
-
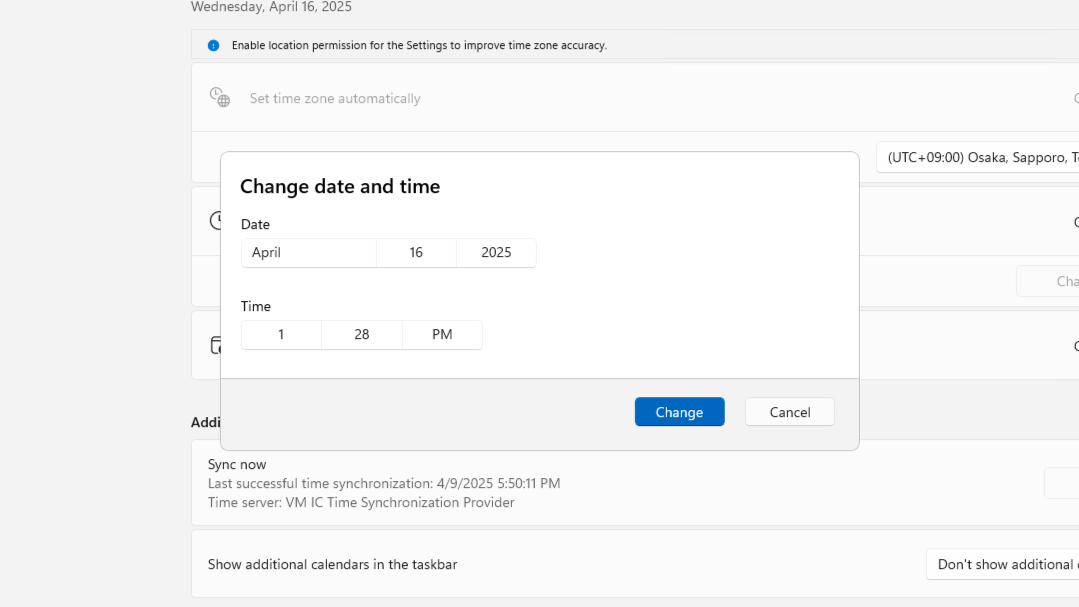
When "Set time automatically" is turned off and the "Set date and time manually" button is selected, the time setting menu opens.
-
Set the current time in the menu, choose the “Change” button, and wait one minute.
-
On the machine where SpeeDBee Synapse is running, start Synapse. See here how to start running.
-
If the time is set correctly, the warning will no longer appear at the top of the SpeeDBee Synapse screen.

6.2.1.2 If SpeeDBee Synapse is Running on Linux,#
follow the steps below to configure Linux time settings.
In the Data Flow Controller edition, you can configure this in the WebUI of Data Flow Controller.
-
On the machine where SpeeDBee Synapse is running, stop Synapse. See here for how to stop running.
-
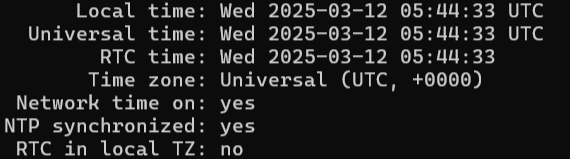
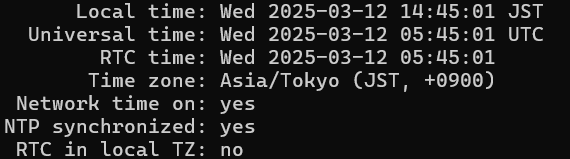
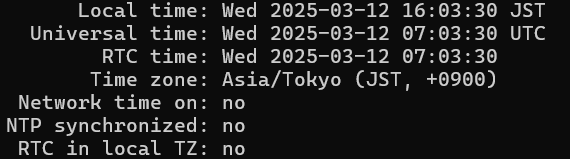
Check the current time on Linux. The following command is used to check the time currently set in the system.
$ timedatectlHere is an example of the result with the time displayed: “Local time” is the currently set system time. If the time is wrong, you need to change the setting.
-
If necessary, change the time zone to the correct region. Since this setting is optional, skip this step if the time zone is correct or if you do not need to configure the setting.
For example, to change the machine running SpeeDBee Synapse to JST, you should use the following command:$ sudo timedatectl set-timezone Asia/TokyoIf the time zone you want to set is not JST, you can use the following command to check the available time zones.
$ timedatectl list-timezonesThe following examples show the results of changing the time zone. You can check the set value by using the command in step 1.
If the PC is connected to the Internet, proceed to the next step. If the PC is not connected to the Internet, go to step 5.
-
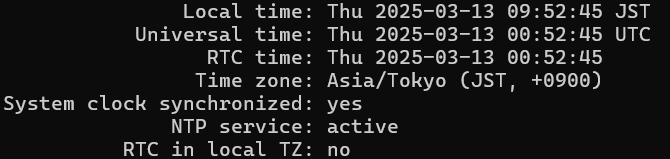
If the PC is connected to the Internet, enable NTP Server. After setting by using the command below, wait one minute and go to step 7.
$ sudo timedatectl set-ntp yesThe following example shows the result of enabling the NTP Server: You can check the set value by using the command in step 1.
If the OS is other than BlackBear
If the OS is BlackBear

If synchronizing the NTP server does not solve the problem, or if your PC is not connected to the Internet, you may need to set the time manually. Then go to the next step.
-
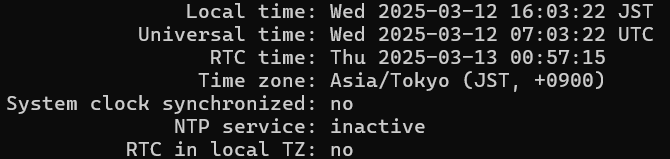
To set the time manually, disable NTP server. It can be set using the following command:
$ sudo timedatectl set-ntp noThe following example shows the result of disabling the NTP Server: You can check the set value by using the command in step 1.
If the OS is other than BlackBear
If the OS is BlackBear
-
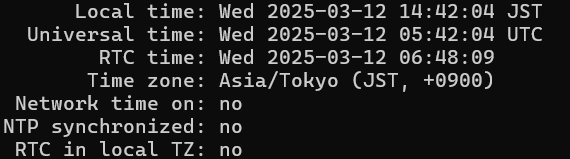
Then change the date and time. The following example shows how to set the date to 16:03:20 on March 12, 2025. In actual use, set the date and time to the desired values. Wait 1 minute after setting.
$ sudo date -s "2025-3-12 16:03:20"Here is an example of the result of changing the date and time: You can check the set value by using the command in step 1.
-
On the machine where SpeeDBee Synapse is running, start Synapse. See here how to start running.
-
If the time is set correctly, the warning will no longer appear at the top of the SpeeDBee Synapse screen.
6.2.1.3 Notes on Time Settings#
You can avoid problems with time settings by following the procedures described in this paragraph. However, machines that are not connected to the Internet or that do not have a Real Time Clock (RTC) will need the same setting after rebooting. Therefore, we recommend that you consider one of the following:
- Establishing proper time synchronization over an Internet connection (only when there are no security concerns)
- Set up an NTP Server within the LAN where the operating machine is working, and automatically synchronize.
- Prevent clock slippage by using RTC module.
6.2.2 Workaround when you cannot connect to the PLC collector#
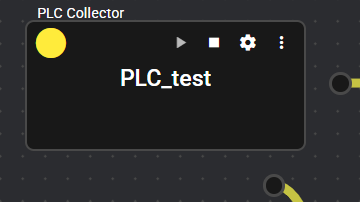
If the PLC collector cannot be connected, the component displays a yellow status light and the status timeline displays NETWORK_TIMEOUT.
See here how to check the status.

6.2.2.1 Checking IP Address#
Confirm the IP address of the PLC being used.
About Devices That Can Be Used for Confirmation
The procedures in this section do not need to be performed on the device running SpeeDBee Synapse. You can also perform them on the PC you are using to view the WebUI of SpeeDBee Synapse.
However, it is more reliable to perform these steps from a PC on the same network as the device running SpeeDBee Synapse.
Note that in the Data Flow Controller edition, you can configure this in the WebUI of Data Flow Controller.
-
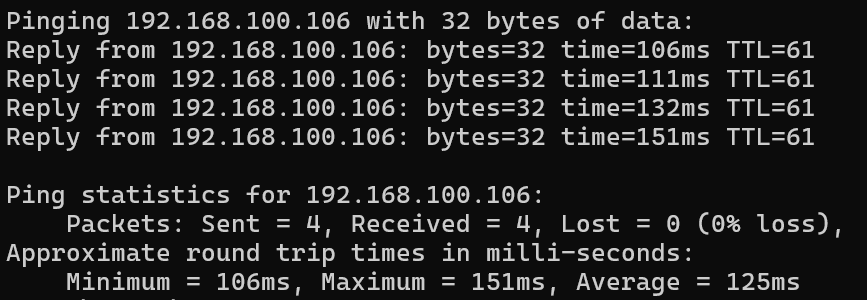
On a networked PC, open PowerShell (or a command prompt) on Windows, while on Linux, run the following command from the terminal.
PS >ping IP address of target PLC- Success screen
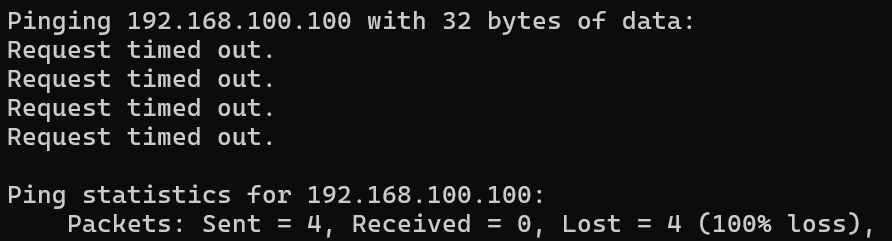
- Failure screen
$ping IP address of target PLCNote: Linux continues to send ping until you type [ctrl] +[C].
- Success screen
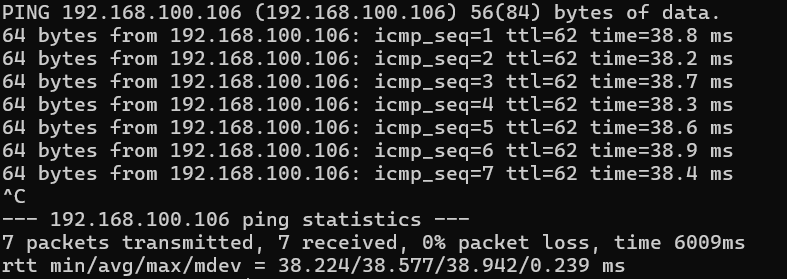
- Failure screen

If ping communication cannot be confirmed, check the settings of your PLC side.
- Success screen
6.2.2.2 Checking Port#
Confirm the port number of the PLC being used.
About Devices That Can Be Used for Confirmation
The procedures in this section do not need to be performed on the device running SpeeDBee Synapse. You can also perform them on the PC you are using to view the WebUI of SpeeDBee Synapse.
However, it is more reliable to perform these steps from a PC on the same network as the device running SpeeDBee Synapse.
-
On a networked PC, open PowerShell (or a command prompt) on Windows, while on Linux, run the following command from the terminal.
PS >IP address of Test-NetConnection target PLC - Port number of Port target PLC-
Screen when the relevant port is open

-
Screen when the relevant port is not open
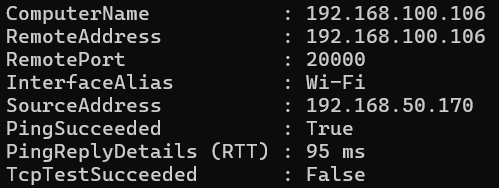
Port number of IP address target PLC of $nc-zv target PLC-
Screen when the relevant port is open

-
Screen when the relevant port is not open

If the port cannot be confirmed to be open, check the settings of PLC side that you are using.
-
6.2.2.3 PLC Side Settings#
For how to set the IP address and port of the PLC, refer to the instruction manual of the PLC you are using.
6.3 How to Detect When a Problem Occurs#
This section describes how to detect when a component error occurs.
6.3.1 How to Detect When a Problem Occurs at a Specific Component#
This section describes how to send an email to notify you when an error occurs in a specific component.
6.3.1.1 Configuring Event Data#
Specify the settings so that event data is registered when the value of errors_run_status output from the detection target component is a value other than Normal or Stopped. Provides email notification when the component status is Warning or Error.
-
Open the panel on which the component you want to detect an error is running, and in Edit Mode, drag and drop ComponentBase- > Logic- > Event Data onto the panel.

-
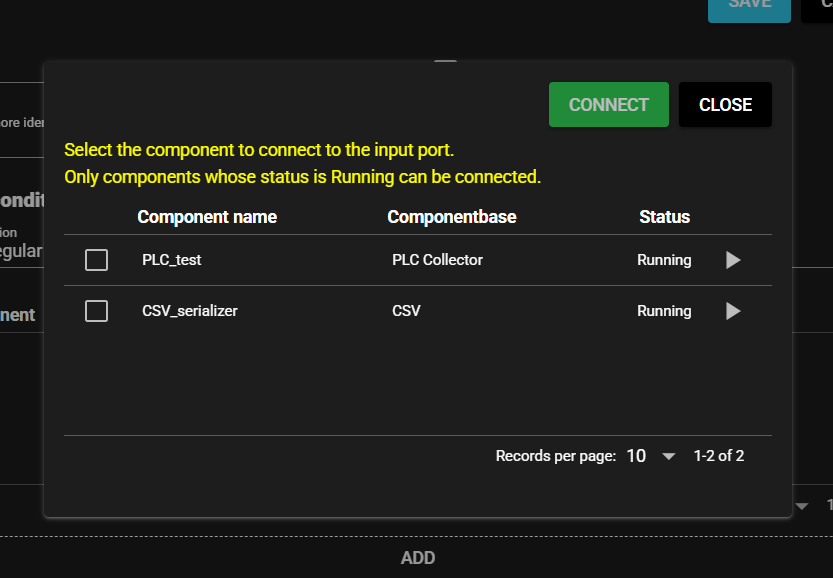
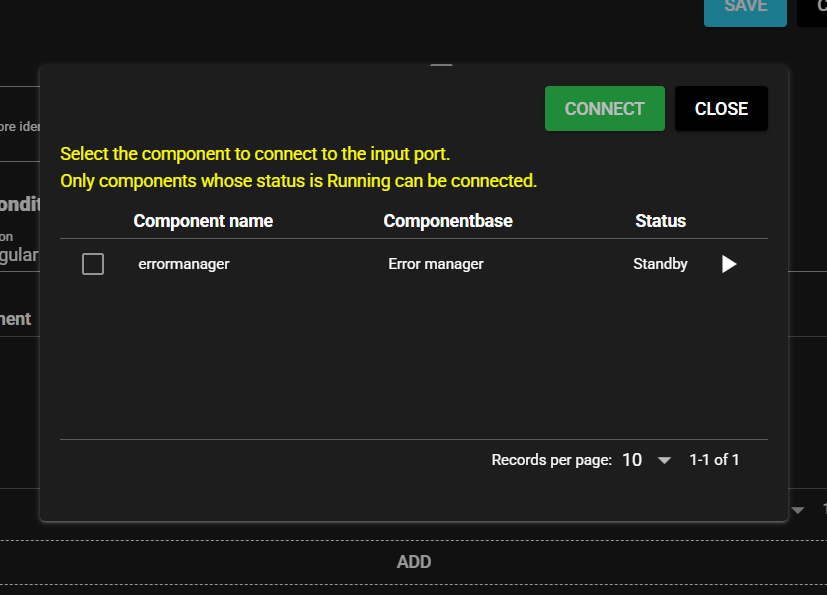
The destination of connection menu for the input port opens. Select “Close” this time to connect to the system port.
-
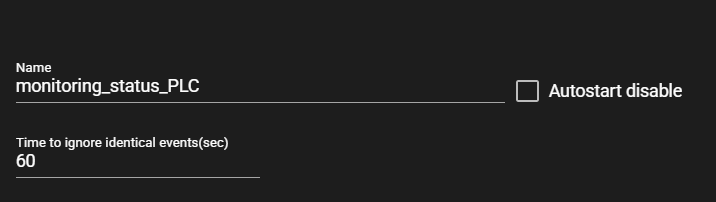
Enter any name. In this example, let us assume that the name is “monitoring_status_PLC”.
-
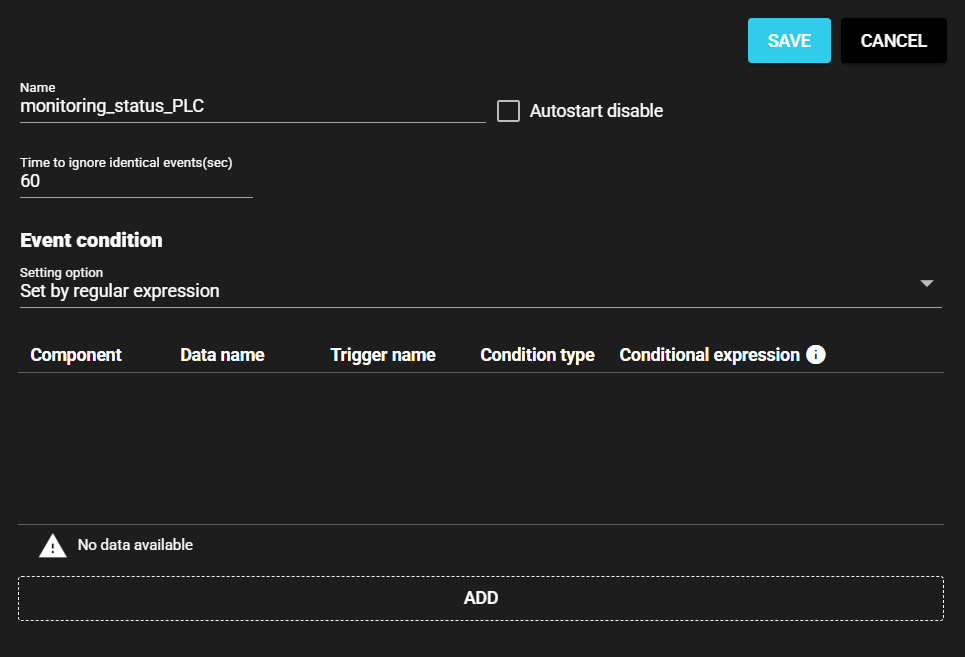
Select the trash can mark and delete the data.

-
Select “Save.”
-
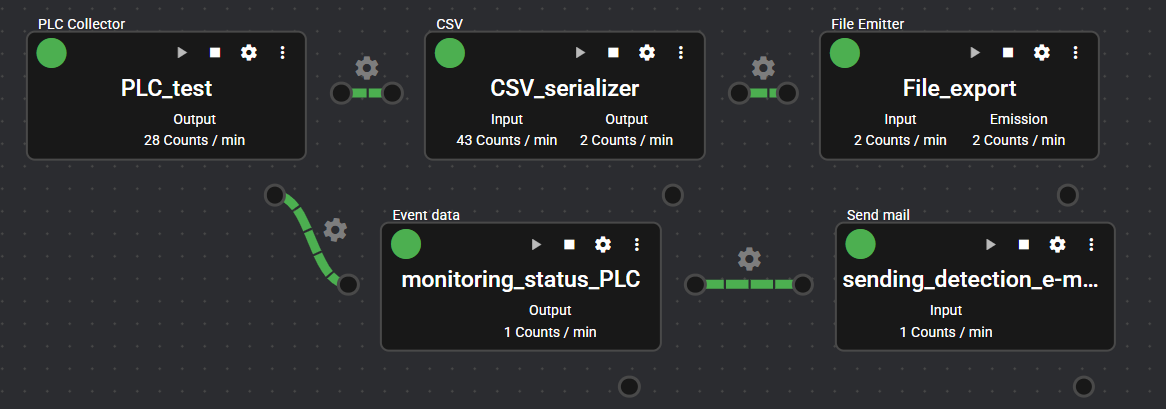
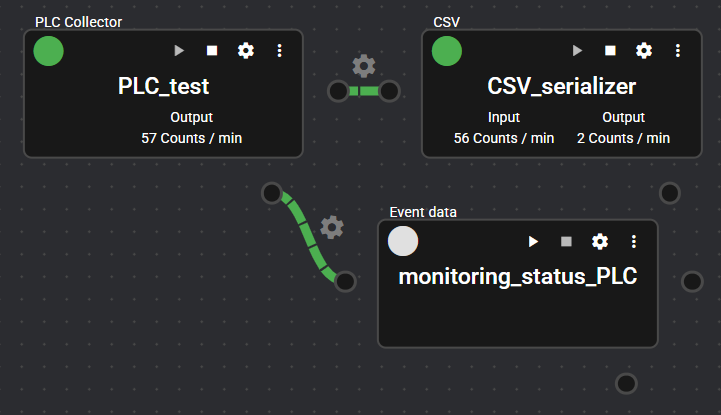
Connect to the system port of the component whose event data you want to detect. In this example, the event data is assumed to be connected to the PLC collector.
-
Open the Setting Menu of event data.
-
Set the event condition. Select "Receive and set data definitions" as the setting method. Set the data name as “errors_run_status”, the trigger name as “trigger”, the condition type as “True”, and the conditional expression as “$VALUE >= 2”.
Then, set the Time to ignore identical events(sec) to 300.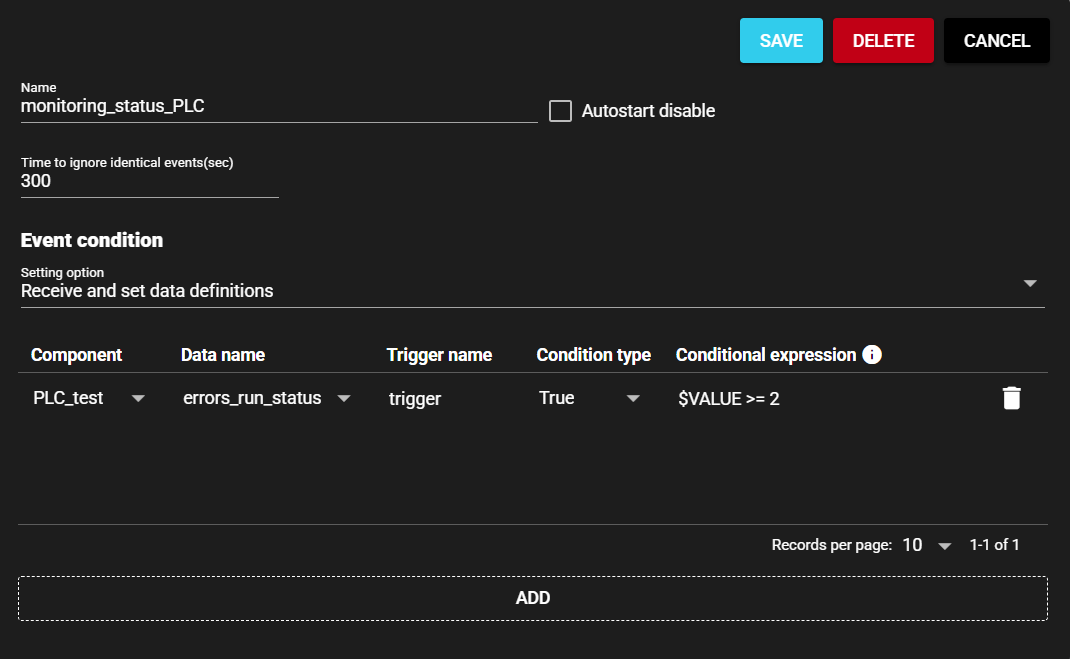
Notes on sending email
With this setting, an email is always sent as long as the problem persists, even after 5 minutes (300 seconds) have elapsed. Please note that the amount of notifications can be huge. To send an email only once when an error occurs, set the condition type to “Raise”.
-
Select “Save.”
-
Start the event data.
The event data settings are now complete.
6.3.1.2 Configuring Email Sending#
Set the value received from the event data to be sent by email.
In this example, the setting for sending by gmail is explained. Make sure you have a usable gmail account, set up two-factor authentication, and create an app password.
-
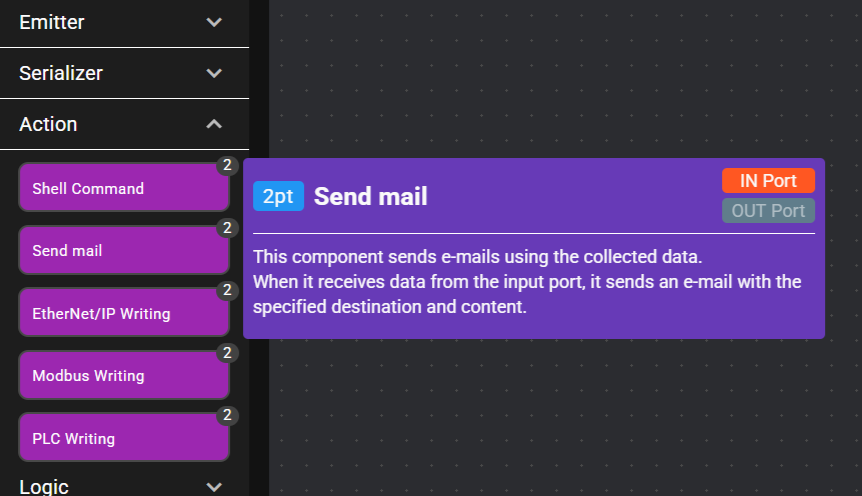
Open the panel on which the component you want to detect an error is running, and in Edit Mode, drag and drop ComponentBase - > Action - > Send email onto the panel.
-
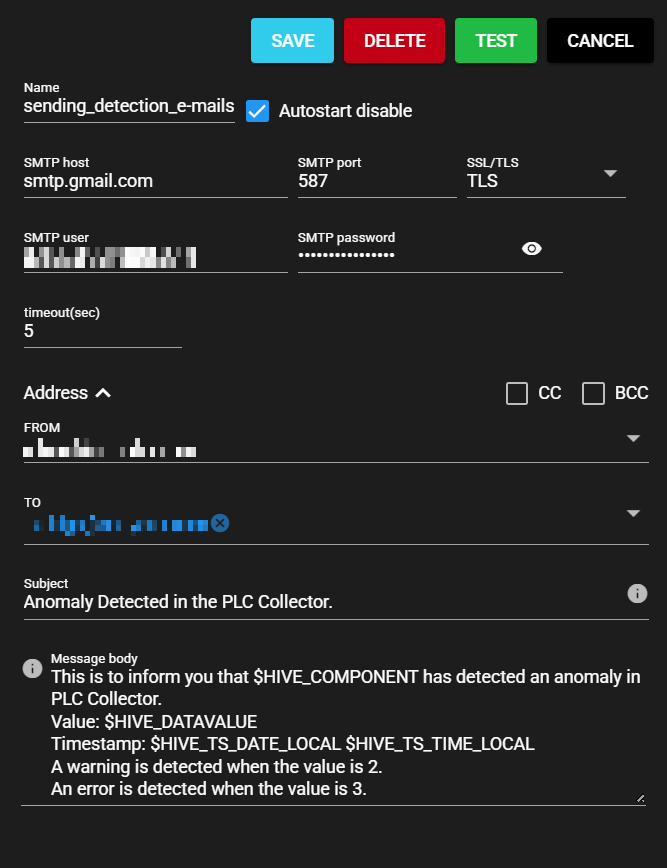
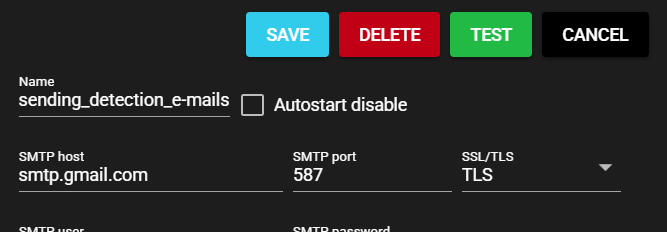
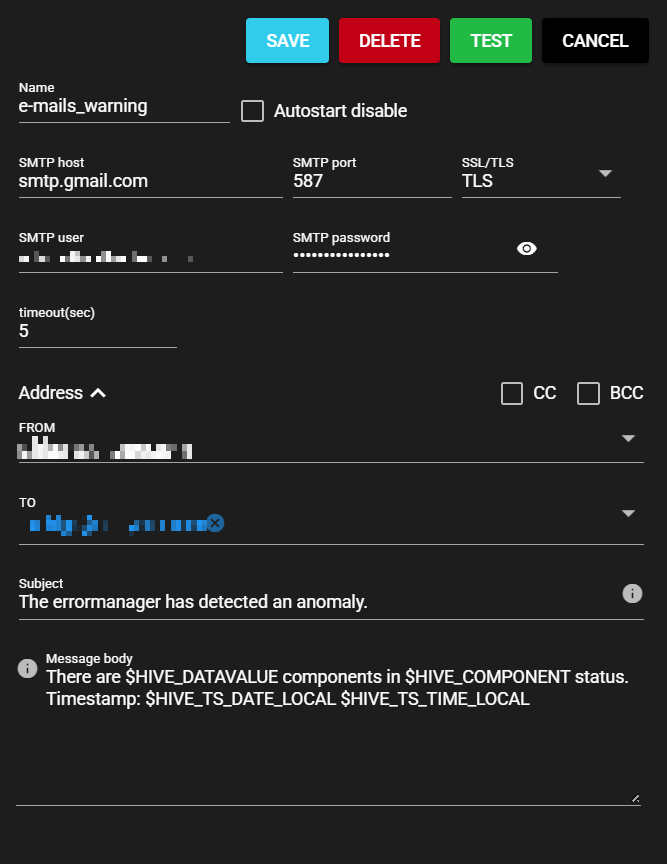
Make the necessary settings. For gmail, the SMTP server is "smtp.gmail.com" and the port (TLS) is "587." For the SMTP password, enter the app password that you created.
-
Select “Save.”
-
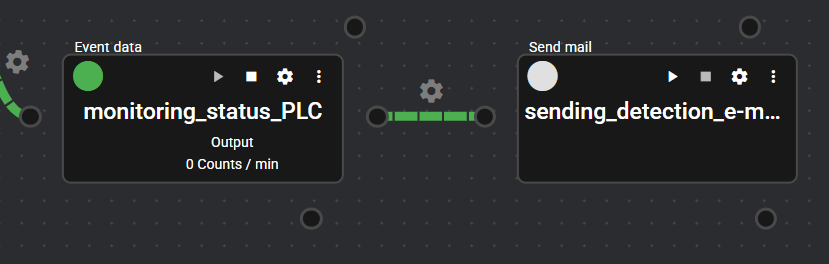
Connect email sending to event data and start the component.
The settings for sending email are now complete.
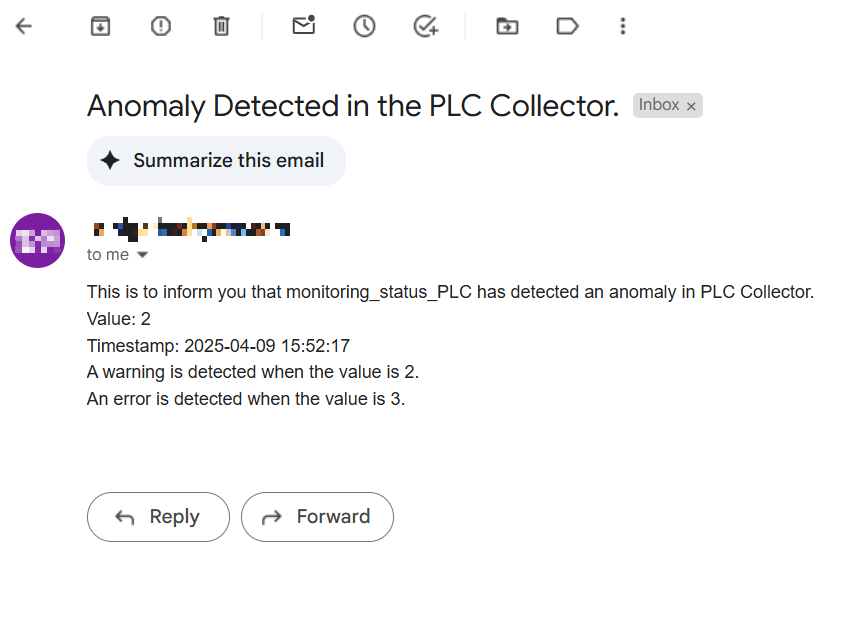
When a component actually fails, the data is sent to the configured email account. Below is an example of an email received.
6.3.2 How to detect when any one of components in Synapse fails#
This section describes how to send an email to notify you when an error occurs in any one of components.
6.3.2.1 Configuring Event Data#
Set event data to be registered when the values of "latest error_component count" and "latest warning_component count" outputted from the error manager increase. Provides email notification when any component status within Synapse is Warning or Error.
-
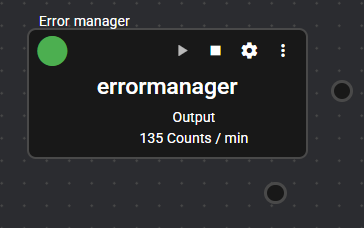
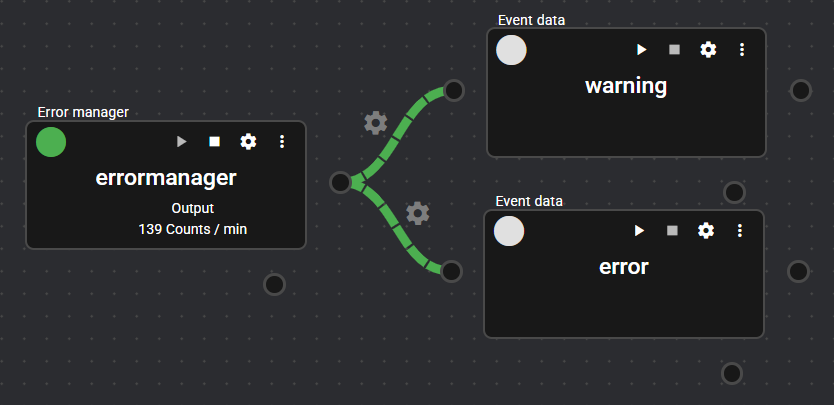
Open the system panel in Edit Mode and start the Error Manager.
-
Drag and drop ComponentBase- > Logic- > Event data onto the panel.
-
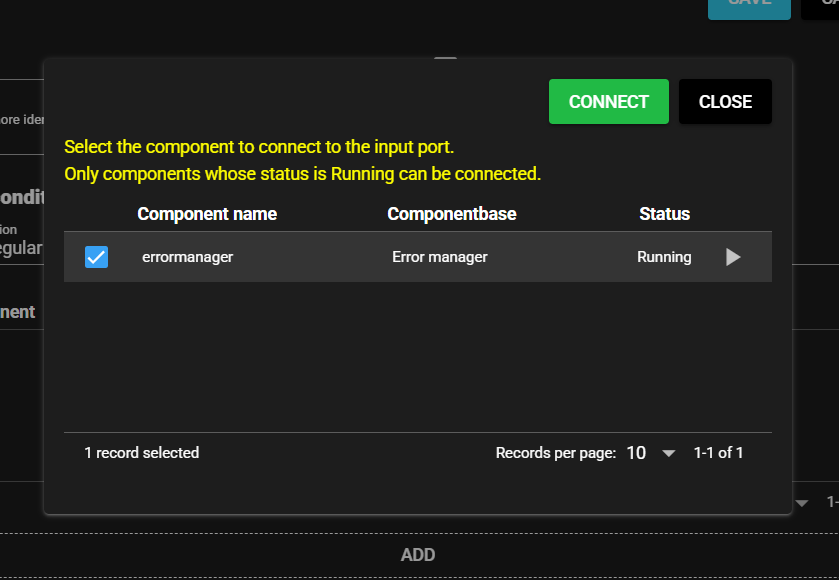
The destination of connection menu for the input port opens. Check errormanager and choose “Connect”.
-
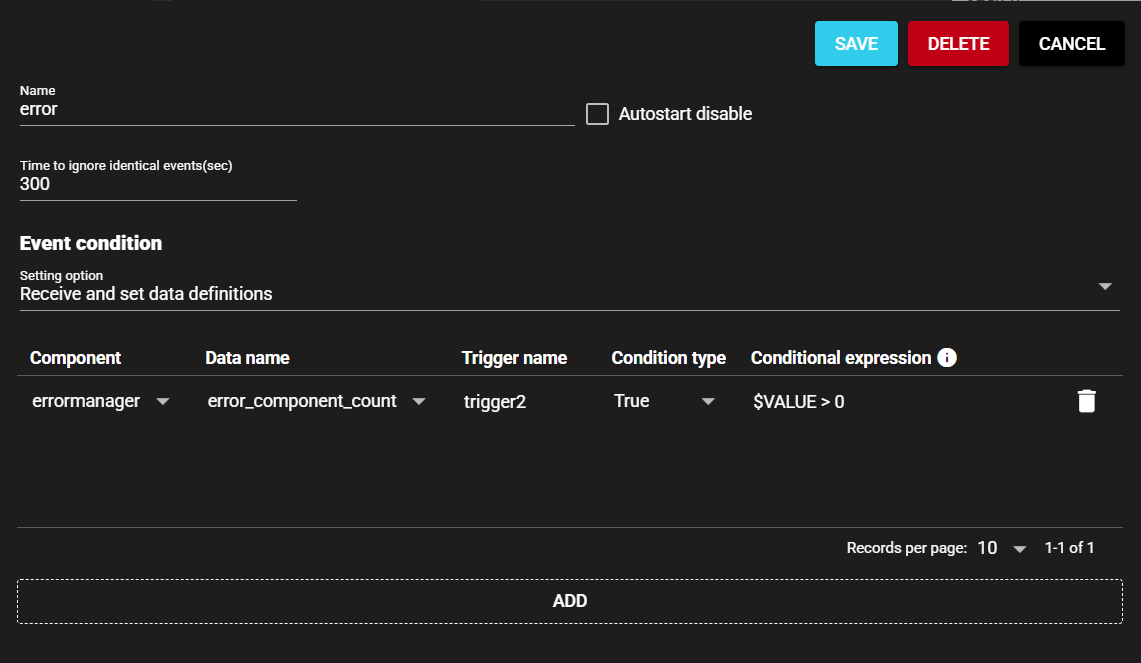
Enter any name, set the event conditions, and select “Save.” Event conditions are created individually for components for which the following conditions (1) and (2) are set.
Time to ignore identical events(sec) “300”, data name “latest_error_component_count”, trigger name “trigger1”, condition type “True”, conditional expression “$VALUE > 0”
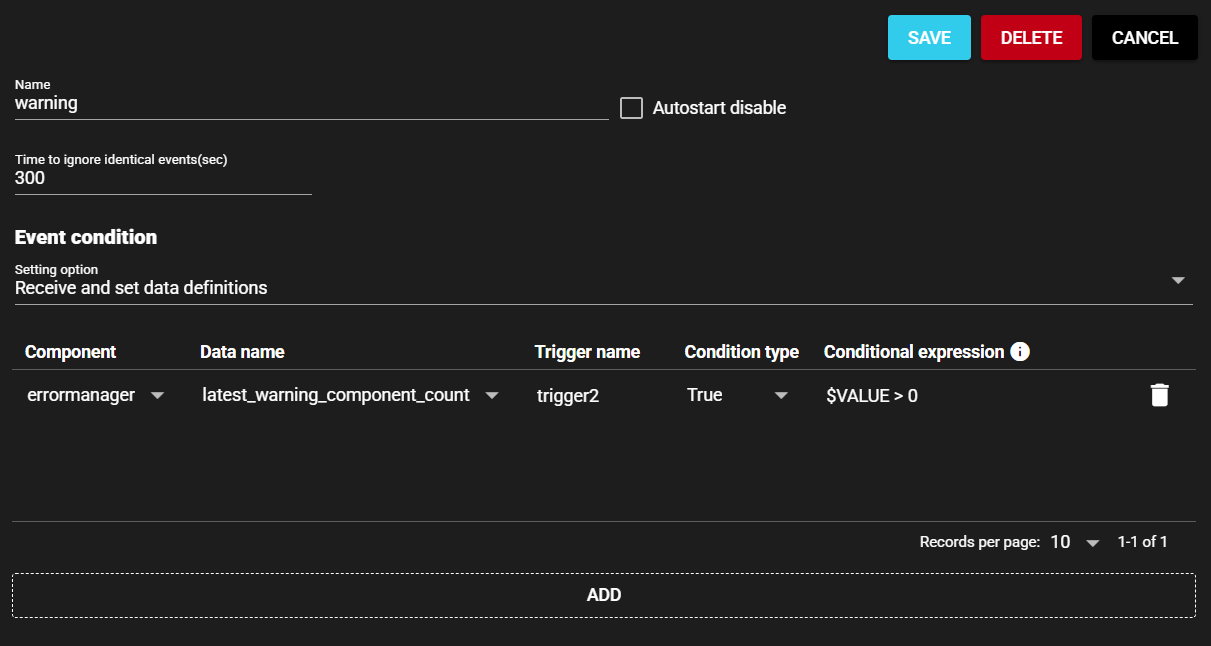
Time to ignore identical events(sec) “300”, data name “latest_warning_component_count”, trigger name “trigger2”, condition type “True”, conditional expression “$VALUE > 0”
Notes on sending email
With this setting, an email is always sent as long as the problem persists, even after 5 minutes (300 seconds) have elapsed. Please note that the amount of notifications can be huge. To send an email only once when an error occurs, set the condition type to “Raise”.
-
Start the event data.
The event data settings are now complete.
6.3.2.2 Configuring Email Sending#
Set the value received from the event data to be sent by email.
In this example, the setting for sending by gmail is explained, as with here. Make sure you have a usable gmail account, set up two-factor authentication, and create an app password.
-
Open the System panel and in Edit Mode, drag and drop ComponentBase- > Action- > Send Mail onto the panel.
-
Make the necessary settings. For gmail, the SMTP server is "smtp.gmail.com" and the port (TLS) is "587." For the SMTP password, enter the app password that you created.
-
Select “Save.”
-
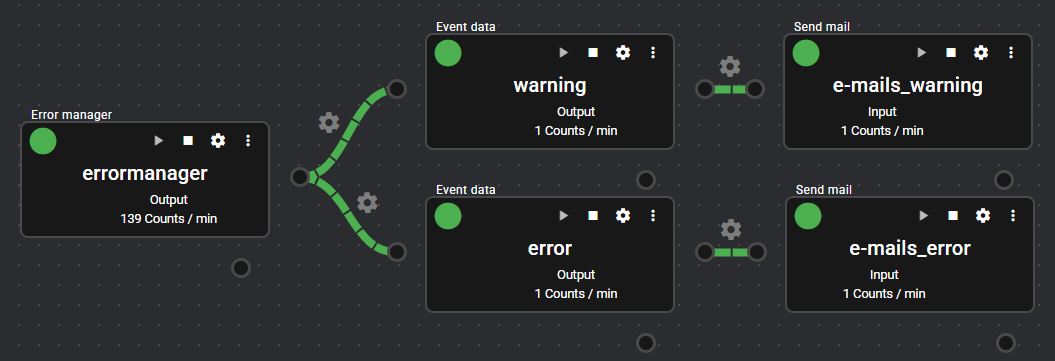
Follow the same steps to create another email sending component. Connect email sending component to the corresponding event data, and start the component.
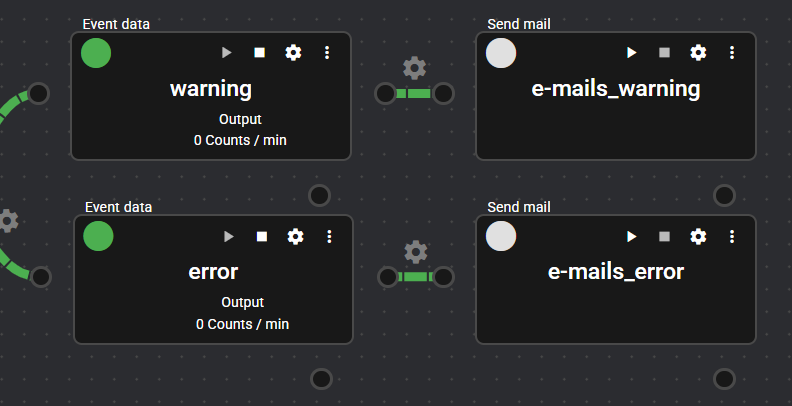
The settings for sending email are now complete.
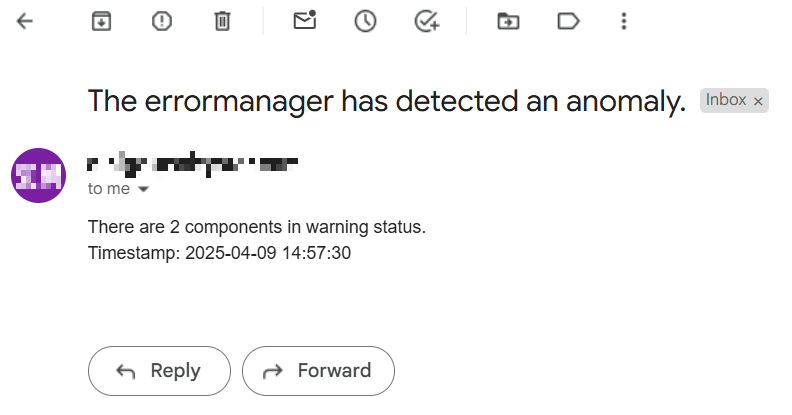
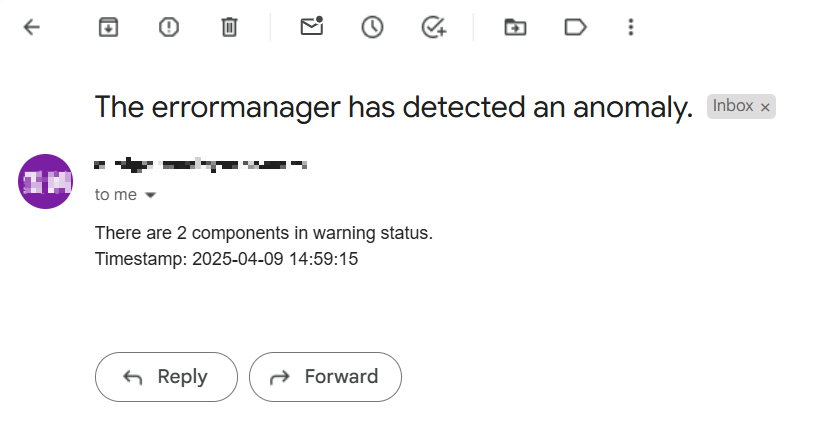
When any component actually fails, the data is sent to the configured email account. Below is an example of an email received.
6.3.3 How to Detect Data Loss in a Time Series Database due to Power Outages#
In Synapse, if a loss occurs in the time series database used internally due to a power failure in the operating machine, the core internal registers the error as a warning status at the next startup.
By capturing this information at the system port, you can be notified by email if there is a data loss.
This procedure describes how to do this.
Caution on data loss due to power failure
Note that, although data loss due to power failure can be detected, data cannot be recovered. It is only a function to detect that some data could not be saved.
6.3.3.1 Configuring Event Data#
Specify the settings so that event data is registered when the value of errors_run_status outputted from the core internal is a value other than Normal or Stopped. When the status lamp indicates a warning or error, an email notification is sent and the power interruption can be detected.
-
Open the System panel and in Edit Mode, drag and drop ComponentBase- > Logic - > Event data onto the panel.
-
The destination of connection menu for the input port opens. Select “Close” this time to connect to the system port.
-
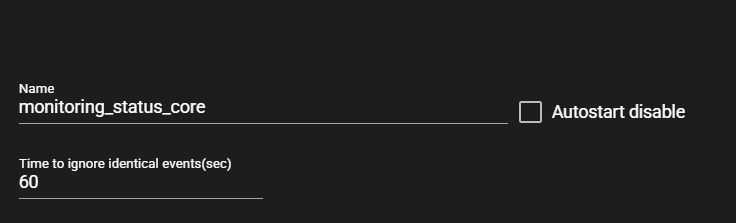
Enter any name. In this example, let us assume that the name is “monitoring_status_core”.
-
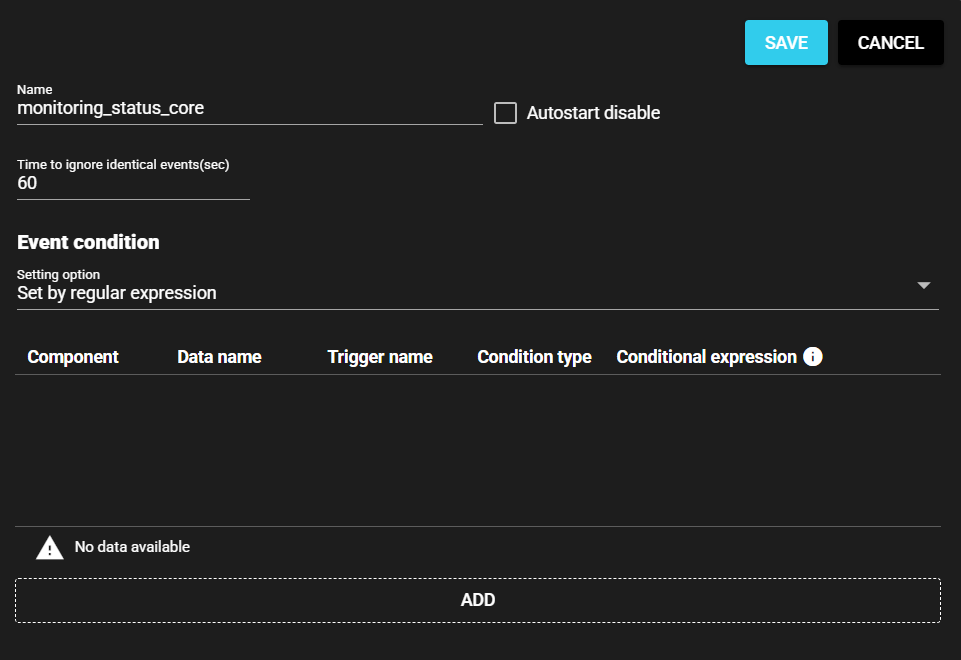
Select the trash can mark and delete the data.
-
Select “Save.”
-
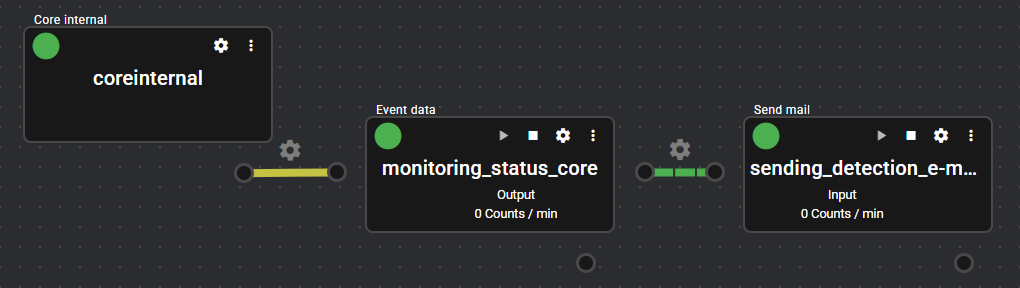
Connect event data to the core internal system port.
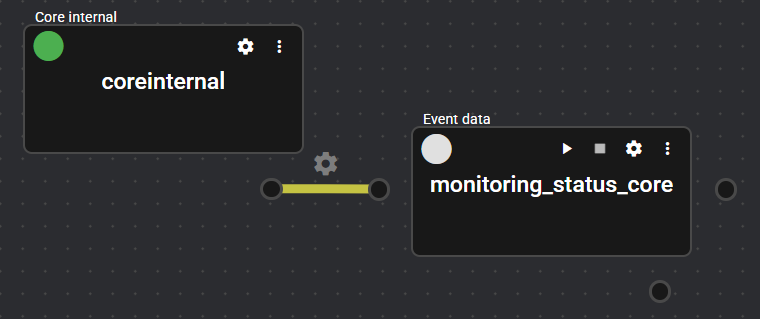
-
Open the Setting Menu of event data.
-
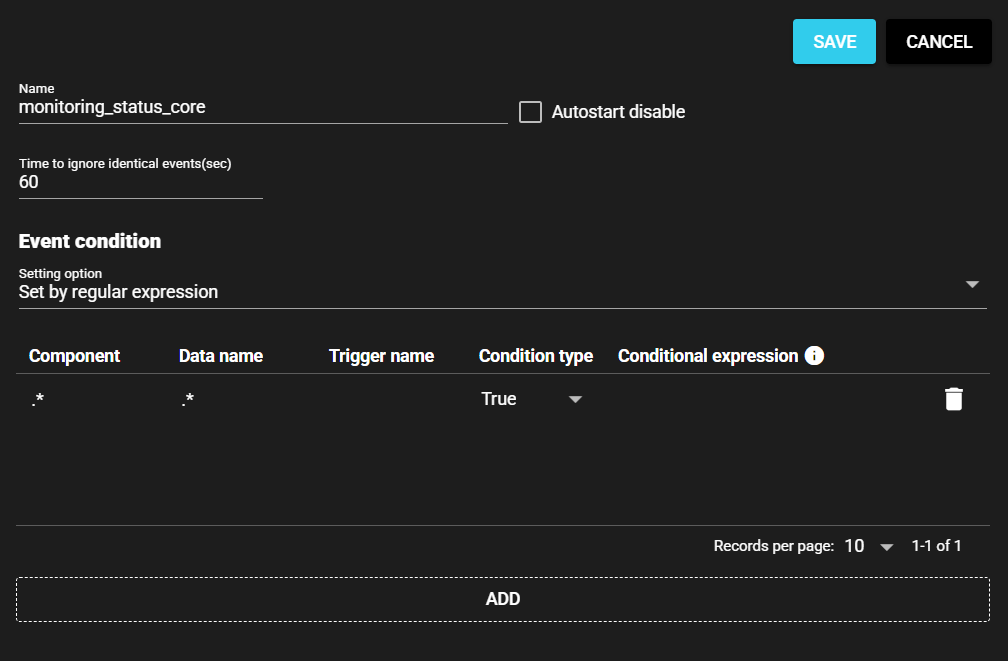
Set the event condition. Select "Receive and set data definitions" as the setting method. Set the data name as “errors_run_status”, the trigger name as “trigger”, the condition type as “True”, and the conditional expression as “$VALUE >= 2”.
Then, set the Time to ignore identical events(sec) to 300.
-
Select “Save.”
-
Start the event data.
The event data settings are now complete.
6.3.3.2 Configuring Email Sending#
Set the value received from the event data to be sent by email.
-
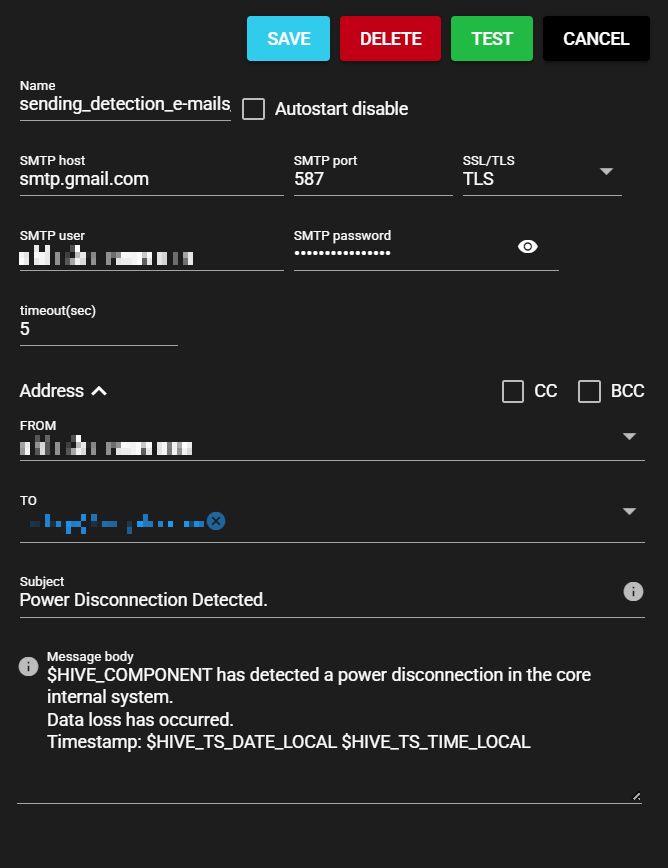
Open the System panel and in Edit Mode, drag and drop ComponentBase- > Action- > Send Mail onto the panel.
-
Make the necessary settings. For gmail, the SMTP server is "smtp.gmail.com" and the port (TLS) is "587." For the SMTP password, enter the app password that you created.
-
Select “Save.”

-
Connect email sending to event data and start the component.
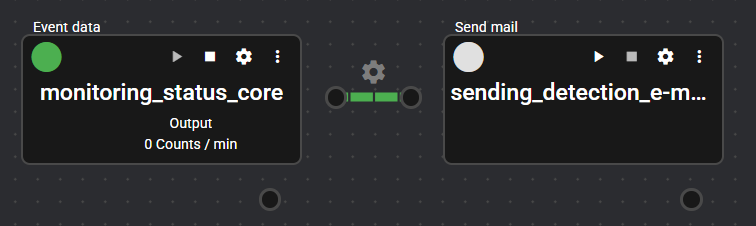
The settings for sending email are now complete.
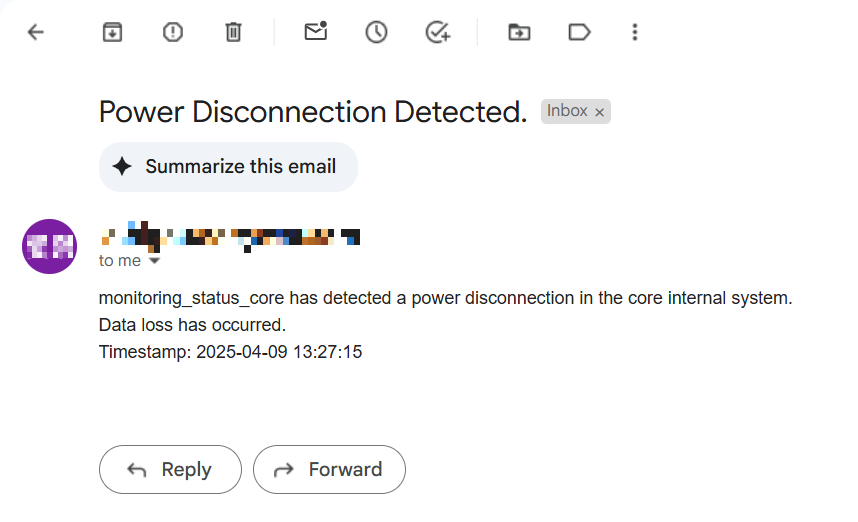
When a power failure actually occurs, the data is sent to the set email account. Below is an example of an email received.