5.1.5 Custom component development environment (SCCDE)
This section explains the Synapse custom component development environment (SCCDE).
5.1.5.1 Overview of SCCDE#
The Synapse custom component development environment (SCCDE) is a collection of tools and packages for developing custom components for Synapse. It currently has the following features:
-
Initialization of custom component administration directory (init)
The administration directory is easy to use with version control systems such as Git and Subversion.
-
Addition of sample programs for custom components (add)
You can add simple sample programs such as collectors, serializers, and emitters.
-
Packaging of custom components (make-package)
Component packaging allows you to combine multiple custom components and custom UIs into a single file (SCCPKG).
By uploading the SCCPKG file from the Synapse administration screen, you can collectively manage multiple custom components.
-
Execution of test environment for custom components (serve)
You can launch a test environment to quickly run your custom components.

Currently, only custom components implemented in Python are supported. Support for components implemented in C is not planned.
5.1.5.2 Uninstalling SCCDE#
SCCDE can be installed in the following ways:
- Installation using the WHL package file distributed with Synapse
- Installatrion from PyPI (pip standard index)
You can install SCCDE on Windows or Linux. However, Synapse must be installed on the same device to perform the test environment execution (serve) function.
Since this package is a standard Python package, various package management tools, including Poetry and uv, can be used in addition to the installation methods using pip and venv as described above.
Use the tool of your choice.
Note: The following procedure assumes that you are using the (sccde) environment that you activated as above.
5.1.5.3 Using SCCDE and Packaging#
5.1.5.3.1 Initializing the Custom Component Administration Directory#
You must provide and initialize an empty directory to manage your custom components. Follow the procedure below to initialize the directory.
(sccde) $ mkdir sccpack-test
(sccde) $ cd sccpack-test
(sccde) $ sccde init
(sccde) $ ls
parameter_ui  source  scc-info.json
(sccde) PS> mkdir sccpack-test
(sccde) PS> cd sccpack-test
(sccde) PS> sccde init
(sccde) PS> ls
Mode                 LastWriteTime         Length Name
----                 -------------         ------ ----
d----          2025/xx/yy    hh:mm                parameter_ui
d----          2025/xx/yy    hh:mm                source
-a---          2025/xx/yy    hh:mm            644 scc-info.json
Initialization of the current directory involves the following operations:
- Generation of
scc-info.json - Addition of sample program for custom component (collector)
The scc-info.json file contains information about the custom components to be managed in this directory.
It is in JSON format, so edit it in a text editor as necessary.
The file supports multilingual properties that enable display of multiple languages in the custom component dialog and component base tooltips.
The major properties are listed below.
| Property | Description |
|---|---|
| package-name | Name of the package. You can give it any name. Since this is a required property, make sure to include it in the scc-info.json file. If no valid value is entered, nothing will be displayed. |
| package-name.{language code} | Multilingual property for package-name. When adding this property, please be careful not to remove the required property package-name.Enter supported language codes by Synapse (e.g., ja or en) in {language code}, and the display will switch according to the language settings. Therefore, the property value must be written in the language corresponding to {language code}.If no valid value is entered, the value of package-name will be displayed; if package-name also has no valid value, nothing will be shown. |
| package-version | A string that indicates the version of the package. As a basic rule, specify three numbers delimited by "."(period). The version string should conform to Semantic Versioning 2.0.0. |
| package-uuid | ID used to identify the package. A random UUID is set by default. Since this is a required property, make sure to include it in the scc-info.json file. As a basic rule, you do not need to change this value. |
| package-description | A description of the package. Enter any character string. If no valid value is entered, nothing will be displayed. |
| package-description.{language code} | Multilingual property for package-description. Add this when you want to display package descriptions in multiple languages.Enter supported language codes by Synapse (e.g., ja or en) in {language code}, and the display will switch according to the language settings. Therefore, the property value must be written in the language corresponding to {language code}.If no valid value is entered, the value of package-description will be displayed; if package-description also has no valid value, nothing will be shown. |
| author | You can include the name of the package creator. |
| license | You can enter the license type for using this package. (BSD, MIT, UNLICENSED, etc.). If it is not necessary, leave this as an empty string. |
| license-file | You can specify a relative path to the file that contains the license details for this package. If it is not necessary, leave this as an empty string. |
| python-components-source | Deployment path for Python custom components to be managed in this directory. This generally does not need to be changed. |
| components | An object for defining multiple custom components. The key must be the UUID of the custom component. |
| components.*.name | Name of custom components. You can give it any name. |
| components.*.description | Description of custom components. Displayed in component base tooltips. If no valid value is entered, the default text will be displayed. |
| components.*.description.{language code} | Multilingual property for components.\*.description. Displayed in component base tooltips.Add this when you want to display custom component descriptions in multiple languages. Enter supported language codes by Synapse (e.g., ja or en) in {language code}, and the display will switch according to the language settings. Therefore, the property value must be written in the language corresponding to {language code}.If no valid value is entered, the value of components.\*.description will be displayed; if components.\*.description also has no valid value, "This component was created and registered by the user." will be displayed. |
| components.*.component-type | Implementation type of custom components. It must be either 'python' or 'c'. |
| components.*.modulename | Module name of Python custom components. Enter the name of module for importing custom components relative to the path specified by python-components-source. |
| components.*.parameter-ui-type | Specify the type in the custom UI definition file. It can be either 'json' or 'html'. |
| components.*.parameter-ui | Specify a relative path to the custom UI. Specify the path to the file in the case of 'json' format, or the path to the directory where the html file is located in the case of 'html' format. |
| python-requirements | An array for describing Python dependency module definitions. Examples "python-requirements": [ "sqlalchemy", "psycopg[binary]", "requests ==2.32.4", "aiohttp >=3,<4;sys_platform == 'win32'", "httpx ==0.28.1;sys_platform == 'linux' and python_version>='3.10'" ] For detailed description format, see Dependency specifiers. *Note: URLs are not supported. |
Multilingual Property Configuration Rules (scc-info.json)
-
Required Properties
Thepackage-nameproperty is required in thescc-info.jsonfile. When adding the multilingual propertypackage-name.{language code}, be careful not to accidentally deletepackage-name.Definition file example (scc-info.json){ "package-name": "example package name", // Existing property (required) "package-name.ja": "カスタムパッケージ名", // Multilingual property (Japanese) "package-name.en": "Custom package name", // Multilingual property (English) .. . } -
Download File Names
File names when downloading packages are always generated frompackage-name, regardless of language settings. -
Priority between multilingual and existing properties
Multilingual properties are referenced with priority, and existing properties are referenced when multilingual support is not available or when no valid values are entered.1 Multilingual properties
Examples:package-name.ja,package-description.enetc.
2 Existing properties
Examples:package-name,package-descriptionetc. -
Invalid values
When the corresponding values are entered, those properties become invalid. The behavior when invalid varies by property, so please check the description of each property.- Empty strings
Example:"package-description": "" - Strings with only whitespace
Example:"package-description.ja": " " - Only tabs and line breaks
Example:"package-description.en": "\t\n"
- Empty strings
5.1.5.3.2 Adding Custom Components#
After you initialize the administration directory, you can add sample programs for custom components with the add subcommand.
(sccde) $ sccde add -t collector
(sccde) PS> sccde add -t collector
The string after -t can be replaced with collector, serializer, emitter, etc.
The added sample programs are initially placed under source/python.
These samples are meant to be run out of the box, but you can use them as a basis to create your own custom components.
For more information on how to implement a custom component, see below.
The added sample components also come with custom UI sample. You can also modify this as needed.
Custom UI is in json format as default.
You can also create a custom HTML-format UI by specifying the -u html option when adding.
5.1.5.3.3 Testing Custom Components#
If Synapse is also installed in the same environment where you installed the SCCDE commands, you can test run the custom components with the serve command.
(sccde) $ sccde serve --port 8123
Preparing Synapse data directories..
Synapse server ready: http://127.0.0.1:8123
:
(sccde) PS> sccde serve --port 8123
Preparing Synapse data directories..
Synapse server ready: http://127.0.0.1:8123
:
The first time you run it, it will take some time to initialize the data directory and install dependent modules.
ready: http://.. message indicates that the URL is ready to be opened in a browser.
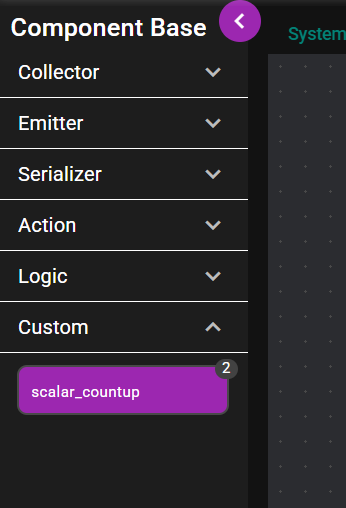
When you open the URL, a screen similar to the Edit Mode in the Synapse flow editor appears. You can now select the custom component you created from the component base list on the left.
You can stop the test Synapse with Ctrl-C.
Options
| Options | Description |
|---|---|
--host |
You can specify an IP address for use by the test Synapse server. If you want to access it from outside the running device, specify 0.0.0.0. The default is 127.0.0.1. |
--port |
You can specify a TCP port number for use by the test Synapse server. Specify a port number so that it does not conflict with another service. The default is 8000. |
--verbose |
This displays the test Synapse execution log. |
Data Directory and Logs
Data running on the test Synapse is placed in the .synapse/var-speedbeesynapse directory in the sccde working directory.
(sccde) $ ls .synapse/var-speedbeesynapse/
certs  config  dblog  hivecore_exec_status.json  logs  projects  sdts.db  sdts.file  webui_tmp
(sccde) PS> ls .\.synapse\var-speedbeesynapse\
Mode                 LastWriteTime         Length Name
----                 -------------         ------ ----
d----          2025/xx/yy    hh:mm                certs
d----          2025/xx/yy    hh:mm                config
d----          2025/xx/yy    hh:mm                dblog
d----          2025/xx/yy    hh:mm                logs
d----          2025/xx/yy    hh:mm                projects
d----          2025/xx/yy    hh:mm                sdts.db
d----          2025/xx/yy    hh:mm                sdts.file
d----          2025/xx/yy    hh:mm                webui_tmp
-a---          2025/xx/yy    hh:mm            105 hivecore_exec_status.json
If you want to clear the data and restore the default state, delete the entire .synapse folder and then start the test Synapse.
You can also look at speedbeesynase.log in .synapse/var-speedbeesynapse/logs if you want to view the log for debugging custom components.
Development Components
Dedicated development components are available while running the test Synapse. For more information about development components, see Development Components.
5.1.5.3.4 Packaging#
After you add the custom component, you can create a package using the make-package subcommand.
(sccde) $ sccde make-package
(sccde) $ ls
custom_component_package_example.sccpkg  parameter_ui  scc-info.json  source
(sccde) PS> sccde make-package
(sccde) PS> ls
Mode                 LastWriteTime         Length Name
----                 -------------         ------ ----
d----          2025/xx/xx    hh:mm                parameter_ui
d----          2025/xx/xx    hh:mm                source
-a---          2025/xx/xx    hh:mm           2481 custom_component_package_example.sccpkg
-a---          2025/xx/xx    hh:mm            644 scc-info.json
The file with the .sccpkg extension is the SCCPKG.
You can register this file in Synapse.
5.1.5.4 Registering SCCPKG File in and Deleting SCCPKG File from Synapse#
You can use the custom components contained in the package by registering the package file (SCCPKG) created by packaging explained in the previous section from the administration screen of Synapse.
5.1.5.4.1 Register/Update#
You can register a created SCCPKG file in SpeeDBee Synapse using the following procedure.
-
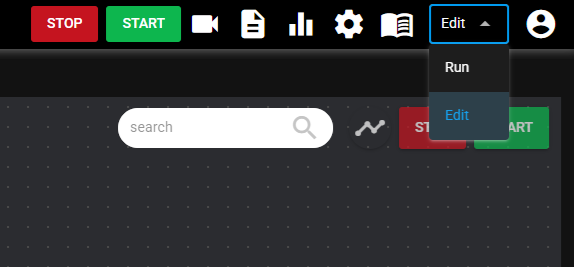
Select "Edit mode" in the header mode selection to open the Edit mode window.
-
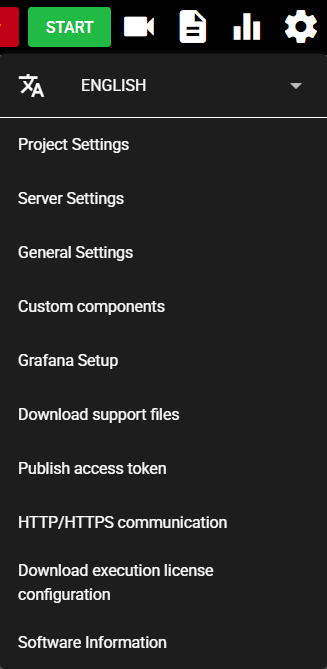
Press the Setting Menu icon and choose [Custom Components].
-
Press [Add] to register the custom component file.
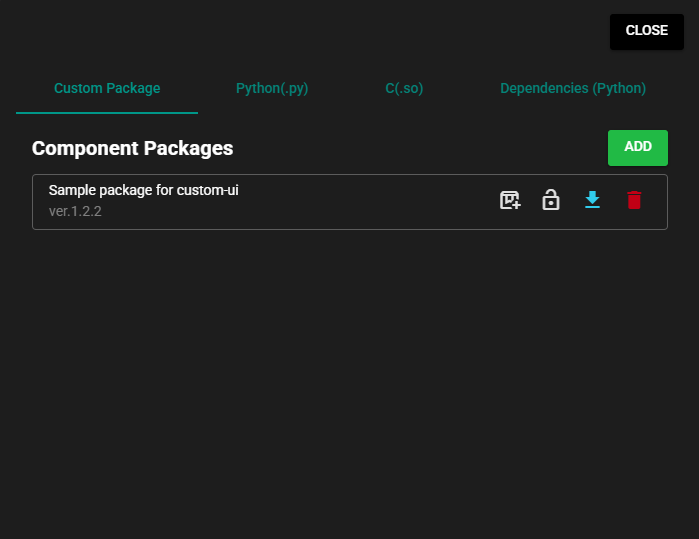
If the same package is already registered, a dialog appears asking you to confirm overwriting. Select [Yes] to overwrite.
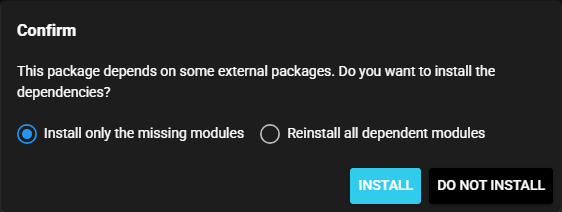
If there are dependent modules, a dialog box will appear asking you to confirm installation. If you want to install them, select [Install].
-
Press [Close].
-
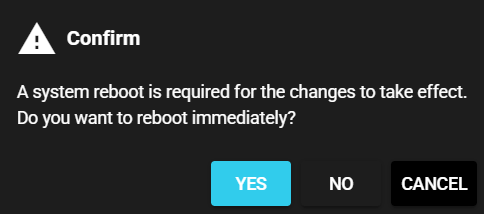
Select [Yes] in the confirmation dialog to restart the system to apply the changes.
-
The left menu shows the registered custom component.
5.1.5.4.2 Dependent modules#
You can install dependent modules as follows:
-
Press the Setting Menu icon and choose [Custom Components].
-
Press the download icon (Dependent modules) for the component package.
-
In the confirmation dialog, select [Install only the missing modules] or [Reinstall all dependent modules] then select [Install].
5.1.5.4.3 Download#
You can download a registered component package as follows:
-
Press the Setting Menu icon and choose [Custom Components].
-
Press the download icon (Get) for the component package.
-
The component package file is downloaded.
5.1.5.4.4 Delete#
You can delete a registered SCCPKG file from SpeeDBee Synapse using the following procedure.
-
Press the Setting Menu icon and choose [Custom Components].
-
Press the trash can icon (Delete) to the right of the target package.
-
Select [Yes] in the confirmation dialog.

-
The SCCPKG file is deleted.
5.1.5.4.5 Protect#
Registered packages can be protected.
Protected packages are not subject to the following operations and therefore are protected from unintended updates:
Packages can be protected as follows:
-
Press the Setting Menu icon and choose [Custom Components].
-
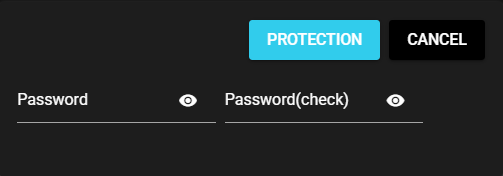
Press the key icon (Protection) to the right of the target package.
-
Enter the password required to remove protection and press [Protection].
Warning
- The password is stored in a undecodable format and cannot be reset until protection is removed.
- If you forget the password for protection, the protected package becomes inoperable.
Be careful when handling passwords.
-
The component package is now protected.

5.1.5.4.6 Unprotect#
To remove protection from a package, follow the procedure below:
-
Press the Setting Menu icon and choose [Custom Components].
-
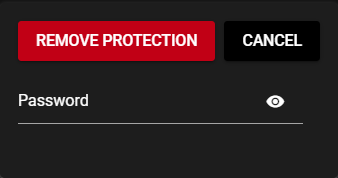
Press the key icon (Remove protection) to the right of the target package.
-
Enter the password set when applying protection and press [Remove protection].
-
The protection is removed from the component package.