5.1.3 Creating C language custom components
This section explains how to create a custom components using C.
5.1.3.1 Prerequisite Knowledge#
The intended readers of this section should have the following knowledge and/or experience:
- Experience in general program development using C
- Preparation of tools necessary for development in C
- Execution of build process using a Makefile
This section also assumes that C programs are built in an environment where SpeeDBee Synapse is running. If you want to build programs in a different environment than the one in which SpeeDBee Synapse runs and later move them to the same environment, you will need to cross-build for that environment. For how to cross-build, refer to the manual or other reference document for the operating environment.
5.1.3.2 Sample Custom Components#
To demonstrate how to implement custom components in C, simple custom components are provided as samples.
Download sample custom components
Alternatively, if you have installed SpeeDBee Synapse, the sample custom components are already installed in the following locations:
$ ls /usr/local/speedbeesynapse/share/sample_component_c/*
/usr/local/speedbeesynapse/share/sample_component_c/cmake_project:
CMakeLists.txt  README.md  countandrandom.c  readandlog.c

/usr/local/speedbeesynapse/share/sample_component_c/makefile_project_for_linux:
Makefile  README.md  countandrandom.c  readandlog.c

/usr/local/speedbeesynapse/share/sample_component_c/makefile_project_for_windows:
Makefile  README.md  countandrandom.c  readandlog.c
The following three sample custom component directories are provided to suit your build environment:
-
cmake_projectProject directory for building with CMake. The same steps can be used to build on both Linux and Windows.
-
makefile_project_for_linuxLinux environment project directory for building with Make.
-
makefile_project_for_windowsProject directory for building with NMAKE on Windows.
5.1.3.2.1 Building Sample Components#
See the respective README.md file for instructions on how to build in each project directory. The components built and generated are the same with all project directories.
If you are running SpeeDBee Synapse on Windows, choose either cmake_project or makefile_project_for_windows.
If you are running SpeeDBee Synapse on Linux, choose either cmake_project or makefile_project_for_linux.
5.1.3.2.2 Sample Description#
This section explains the following sample as an example of custom component.
-
count_and_random(countandrandom.c)This component creates the following two columns for output ports and continues to output data.
Column name Description count A value counting up from 1 is registered once every 3 seconds. random A random value in the range [0.0, 100.0) is registered once every 3 seconds. -
read_and_log(readandlog.c)This component receives data from the input port and outputs it to string columns and logs.
5.1.3.2.3 Execution#
A successful build of a sample component generates a .so file on Linux or a .dll file on Windows for each component.
The generated .so or .dll file can be registered from the WEBUI to be used as a component from SpeeDBee Synapse.
For instructions on how to register these files, see Using Custom Components.
Once the files are registered and the core is restarted, the new custom components are available from the SpeeDBee Synapse screen just like any other component.
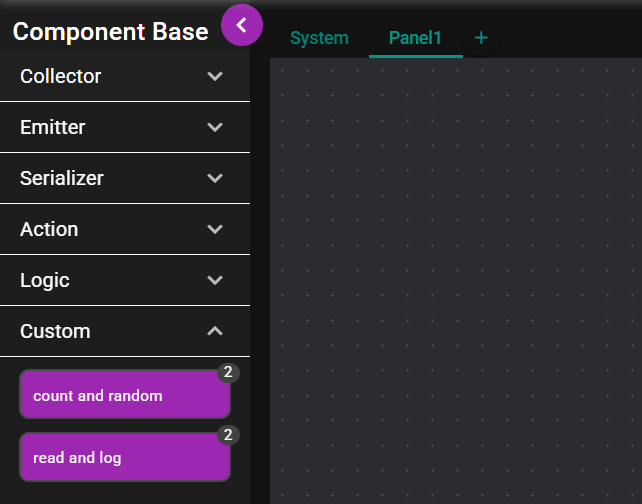
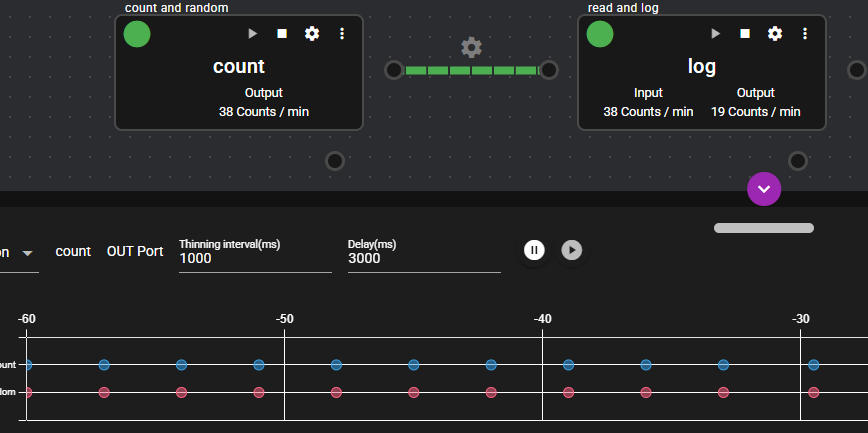
You can concatenate count_and_random and read_and_log and execute them to display their output columns.
The following monitors the output ports of count_and_random.
5.1.3.3 Custom Component Implementation Details#
The following sections describe the implementation of custom components using as examples source codes that use the sample custom components count_and_random and read_and_log.
5.1.3.3.1 Include Header#
When developing custom components in C, you must include the header file hiveframework.h.
#include <hiveframework.h>

 :  Followed by implementation of custom components
5.1.3.3.2 Custom Component Information Definition#
In a C source code for a custom component, the name and identity of the component and the lifecycle callback function must be defined using the following global variables.
  :  Definition of functions used by custom components

const static HIVE_COMPONENT_DEFINITION info = {
  .uuid            = "2e80ad02-1730-4bdc-b321-2fbc2d1b942e",
  .name            = "count and random",
  .parameter_type  = HIVE_COMPONENT_PARAMETER_NONE,
  .in_ports        = 0,
  .out_ports       = 1,
  .functions     = {
    .constructor        = NULL,      // optional
    .premain            = premain,   // optional
    .main               = mainloop,  // required
    .postmain           = postmain,  // optional
    .destructor         = NULL,      // optional
    .stop               = NULL,      // optional
  },
};
EXPORT_COMPONENT_DEFINITION(info);
| Member name | Definition information | Description |
|---|---|---|
uuid |
UUID | The UUID is used to identify the component. Generate a random ID and set it here. |
name |
Component name | Set the name for the component. Since this name is displayed on the screen, it is better to use a name that distinguishes this component from other components. |
tag |
Tag | This adds a tag to the component. Use "collector," "emitter," "serializer," "action," or "logic" to specify under which component base to place the component. If this member is omitted, the component is placed under Custom. |
parameter_type |
Parameter type | While you can choose the type of parameter to be passed to this component from NONE, TEXT, and JSON, this item is currently not used. |
out_ports |
Number of output ports | Set the number of output ports for this component. To pass data to an input port of another component, set this to 1. |
in_ports |
Number of input ports | Set the number of input ports for this component. To receive data from an output port of another component, set this to 1. |
functions |
List of callback functions | Set the list of functions that implement the operations of this component. See the next section for details. |
Always generate random IDs for UUIDs. If you use the same UUID as another component, you may not be able to use either component.
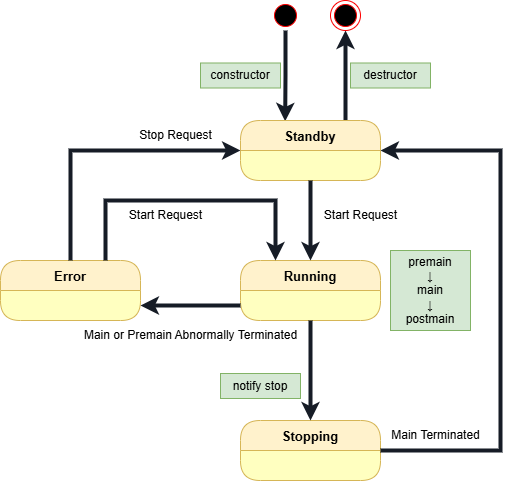
5.1.3.3.3 Lifecycle Callback Definition#
The functions member explained in the previous section can specify the function pointers called
based on the lifecycle of the component instance.
| Callback function | Description |
|---|---|
constructor |
This function is called when the component instance is generated. |
destructor |
This function is called when the component instance is destroyed. |
premain |
This function is called before the "main" function when starting the component. |
main |
This function implements the main processing of the component. This function must continue to loop without exiting until the component is requested to terminate. |
postmain |
This function is called when a component exits, just after the "main" function ends. |
stop |
This function is executed when a component is requested to stop during the execution of the "main" function. |
The functions definition as per the previous section is defined at the end of count_and_random of the sample component.
Because constructor and destructor are not required for this component, they are omitted (specified as NULL). The premain and postmain definitions can also be omitted if they are not necessary. (In this example, only log output is actually implemented.)
The main definition is required because it is the body of the component's processing.
The actual function definition name must be something else, such as mainloop. Giving the name main would conflict with the main function of the C executable body.
The following sections explain the implementation of the main function in the sample program.
5.1.3.3.4 Creating Output Port Columns and Registering Data (count_and_random)#
The following is the main processing of the custom component count_and_random.
The procedure for outputting data is explained based on this operation.
static bool mainloop(HIVE_COMPONENT comp, const char *param, HIVE_STATUS status) {
  HIVE_LOG_INFO("create columns");
  HIVE_OUTCOLUMN clm_count = hive_outport_create_column(comp, OUTPORT1, "count", HIVE_DATA_SCALAR(HIVE_TYPE_INT32), HIVE_COLUMN_OPTION_NONE);
  HIVE_OUTCOLUMN clm_random = hive_outport_create_column(comp, OUTPORT1, "random", HIVE_DATA_SCALAR(HIVE_TYPE_DOUBLE), HIVE_COLUMN_OPTION_NONE);

  int count = 1;
  while (hive_component_runnable(comp)) {
    HIVE_LOG_INFO("insert count");
    if (!hive_outcolumn_insert(clm_count, &count)) {
      HIVE_API_ERROR err = hive_get_api_error();
      HIVE_LOG_ERROR("insert 'count' failed: errcode=0x%08x", err.code);
    }

    HIVE_LOG_INFO("insert random");
    double r = 100 * (double)rand() / (double)RAND_MAX;
    if (!hive_outcolumn_insert(clm_random, &r)) {
      HIVE_API_ERROR err = hive_get_api_error();
      HIVE_LOG_ERROR("insert 'count' failed: errcode=0x%08x", err.code);
    }

    usleep(3000000);
    count++;
  }

  return true;
}
-
Creating a column
First, a column is created.
HIVE_OUTCOLUMN clm_count = hive_outport_create_column(comp, OUTPORT1, "count", HIVE_DATA_SCALAR(HIVE_TYPE_INT32), HIVE_COLUMN_OPTION_NONE);
HIVE_OUTCOLUMN clm_random = hive_outport_create_column(comp, OUTPORT1, "random", HIVE_DATA_SCALAR(HIVE_TYPE_DOUBLE), HIVE_COLUMN_OPTION_NONE);
This component uses
count, a 32-bit integer column, andrandom, a double-precision floating point column. Thehive_outport_create_column()function is used to create a column by specifying the column name, data type, etc. as arguments. Keep the return value in a variable, because you will use it later to populate the column.All data output by the component must be registered in this generated column.
-
Repeating periodic operation
To periodically register data, the "while" loop is used to implement repeated operation.
int count = 1;
while (hive_component_runnable(comp)) {
  :

  usleep(3000000);
  count++;
}
The loop condition calls
hive_component_runnable(), which returns true while the component is running. If you request to stop the component from the screen, this function will return false, so in that case you should promptly terminate themainloopfunction.In addition to the while loop, you can use
hive_component_interval_call()for iteration. Follow the link for instructions on how to use it. -
Registering data in the column
Data is registered in the column in an iterative process.
if (!hive_outcolumn_insert(clm_count, &count)) {
  HIVE_API_ERROR err = hive_get_api_error();
  HIVE_LOG_ERROR("insert 'count' failed: errcode=0x%08x", err.code);
}

double r = 100 * (double)rand() / (double)RAND_MAX;
if (!hive_outcolumn_insert(clm_random, &r)) {
  HIVE_API_ERROR err = hive_get_api_error();
  HIVE_LOG_ERROR("insert 'count' failed: errcode=0x%08x", err.code);
}
Data registration can be done using
hive_outcolumn_insert(). Specify the previously created column variable as the first argument and the pointer to the data to be registered as the second argument. The pointer must match the data type previously specified when the column was created. Note that specifying the wrong type of data may cause the software to terminate abnormally.Maximum size that can be registered with insert
The maximum size of data that can be registered with hive_outcolumn_insert() is 512 bytes (STRING is 511 bytes, not including null). When a value exceeding the maximum size is registered, the return value is false.
5.1.3.3.5 Reading Data from Input Port (read_and_log)#
The following is the main processing of the custom component read_and_log. (Comments and log output are omitted.)
static bool mainloop(HIVE_COMPONENT comp, const char *param, HIVE_STATUS status) {
  HIVE_OUTCOLUMN clm_log = hive_outport_create_column(comp, OUTPORT1, "log", HIVE_DATA_SCALAR(HIVE_TYPE_STRING), HIVE_COLUMN_OPTION_NONE);

  HIVE_CONTINUOUS_READER *creader
    = hive_inport_continuous_reader(comp, INPORT1, hive_timestamp()+5000000000UL);

  hive_time_t last_updated = 0;
  while (hive_component_runnable(comp)) {
    const HIVE_COLUMN_READ_RESULT *read_result = hive_continuous_reader_read(creader);
    if (!read_result) {
      continue;
    }

    if (last_updated < read_result->incolumn_list->updated_at) {
      last_updated = read_result->incolumn_list->updated_at;
    }

    HIVE_RECORD_ITERATOR iter = HIVE_GET_RECORD_ITERATOR(read_result);
    const HIVE_RECORD *record;
    while ((record = HIVE_RECORD_ITERATOR_GET_NEXT(&iter)) != NULL) {
      for (int i=0; i < record->data_count; i++) {
        const HIVE_RECORD_DATA *rd = HIVE_RECORD_GET_DATA(record, i);
        if (rd && rd->data_size != 0) {
          log_record(clm_log, record->timestamp, &read_result->incolumn_list->incolumns[i], rd);
        }
      }
    }
  }
  hive_continuous_reader_release(creader);

  return true;
}
-
Creating a column
This component also creates a column first.
HIVE_OUTCOLUMN clm_log = hive_outport_create_column(comp, OUTPORT1, "log", HIVE_DATA_SCALAR(HIVE_TYPE_STRING), HIVE_COLUMN_OPTION_NONE);This column is for outputting strings.
-
Data retrieval loop
The process of repeatedly receiving data from the input port is as follows.
HIVE_CONTINUOUS_READER *creader
  = hive_inport_continuous_reader(comp, INPORT1, hive_timestamp()+5000000000UL);

:
while (hive_component_runnable(comp)) {
  const HIVE_COLUMN_READ_RESULT *read_result = hive_continuous_reader_read(creader);
  if (!read_result) {
    continue;
  }

  :
}
hive_continuous_reader_release(creader);
The following four functions are used here:
hive_inport_continuous_reader()
This function creates a handle to continuously retrieve data from an input port.hive_continuous_reader_release()
This function is used to release the handle when stopping the retrieval of data.hive_continuous_reader_read()
This function retrieves data from the created handle. The retrieved data is returned as a pointer to aHIVE_COLUMN_READ_RESULTstructure, butNULLmay be returned if there is no data yet, in which case it should be ignored.hive_component_runnable()
This function was also used in the previous section. It returns true while the component is in the Running state. If you request to stop the component from the screen, this function will return false, so in that case you should promptly terminate themainloopfunction.
-
Reading the records of retrieved data
hive_continuous_reader_read()This function collectively retrieves data entering from the input port for a certain time width and stores it inread_result, a pointer to aHIVE_COLUMN_READ_RESULTstructure. TheHIVE_COLUMN_READ_RESULTstructure consists of multiple records that store data from the same time as shown below. Each record stores multiple columns of data.
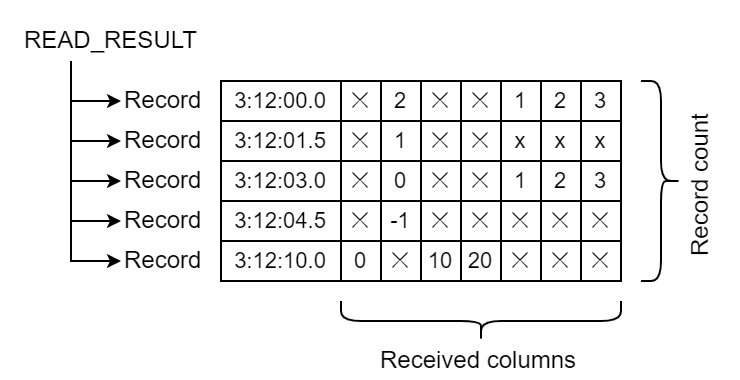
The following double loop allows for processing one record at a time from this structure.
HIVE_GET_RECORD_ITERATOR() andHIVE_RECORD_ITERATOR_GET_NEXTare loops for records, and the for statement inside the loop, with variablei, is the repetition of data processing of each record.HIVE_RECORD_ITERATOR iter = HIVE_GET_RECORD_ITERATOR(read_result); const HIVE_RECORD *record; while ((record = HIVE_RECORD_ITERATOR_GET_NEXT(&iter)) != NULL) { for (int i=0; i < record->data_count; i++) { const HIVE_RECORD_DATA *rd = HIVE_RECORD_GET_DATA(record, i); if (rd && rd->data_size != 0) { // rd holds 1 column worth of data here log_record(clm_log, record->timestamp, &read_result->incolumn_list->incolumns[i], rd); } } } -
Handling of each data object within a record
Information for a single data object can be obtained from the
incolumn_listmember of theHIVE_RECORDandHIVE_COLUMN_READ_RESULTstructures.Item Type Reference example in this sample program Description Data name const char* read_result->incolumn_list->incolumns[i]->data_nameName of the column storing the data Component name const char* read_result->incolumn_list->incolumns[i]->source_nameName of component that generated the data Data type HIVE_DATA_TYPE read_result->incolumn_list->incolumns[i]->data_typeData type of the column storing the data Data size uint32_t HIVE_RECORD_GET_DATA(record, i)->data_sizeData size of actual data Data address char * HIVE_RECORD_GET_DATA(record, i)->dataAddress storing the actual data As shown above, the actual data is a
const charpointer. Note that since it may accept different data types, you must identify the data withHIVE_DATA_TYPEand cast and reference it according to each type.
5.1.3.3.6 Log Output#
A component can output logs at any time.
  HIVE_LOG_INFO("create columns");
  HIVE_LOG_INFO("x=%d, y=%f, z=%s", x, 12.34, "aiueo");
  HIVE_LOG_ERROR("insert 'count' failed: errcode=0x%08x", err.code);
You can output the log in the same format as printf() in the standard library, as shown above.
The output log can be downloaded from the screen.
See Various Logs.
5.1.3.3.7 Component Parameters#
When you generate a component instance from the screen, you can set the component's runtime parameters as its settings.
Parameter type can be JSON or STRING.
In either case, components implemented in C will be passed to the second argument of the main function as a const char* string, which can be parsed or handled directly as a string by the standard library sscanf.
static bool mainloop(HIVE_COMPONENT comp, const char *param, HIVE_STATUS status) {
  int val1, val2;
  sscanf(param, "%d,%d", &val1, &val2); // perform parameter as a number string

  // some process using 'val1' and 'val2'.
}
If you want to work with JSON format parameters, you also need to parse the JSON-format string stored in param. Since JSON is not handled by API in this system, consider using a general-purpose library.
Reference
5.1.3.4 API for Custom Components#
Many API functions are provided in addition to the functions introduced in this section. For more information, see the Custom Component C-API Reference in the appendix.
5.1.3.5 Using Custom Components#
This section explains how to use custom components created in SpeeDBee Synapse.
5.1.3.5.1 Add#
You can register a built custom component in SpeeDBee Synapse using the following procedure.
-
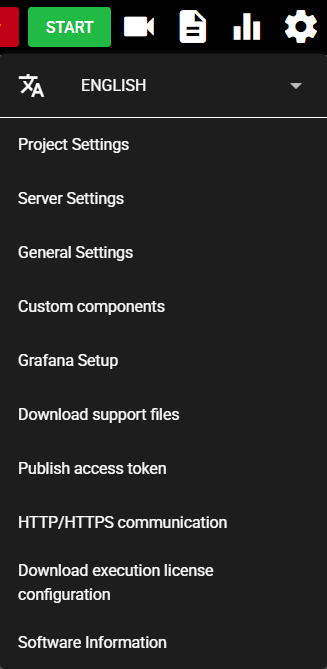
Press the Setting Menu icon and choose [Custom Components].
-
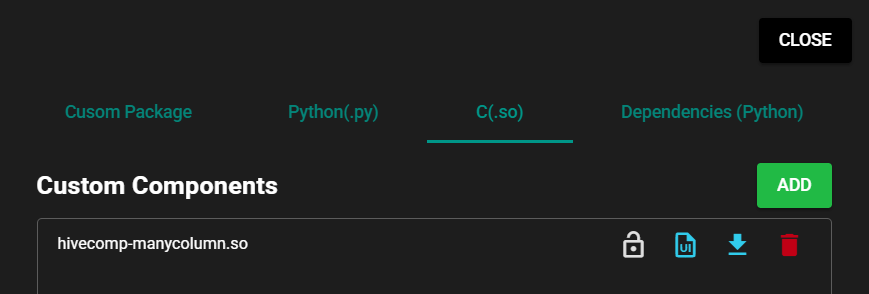
Select [C(.so)] in the tab at the top of the dialog.

-
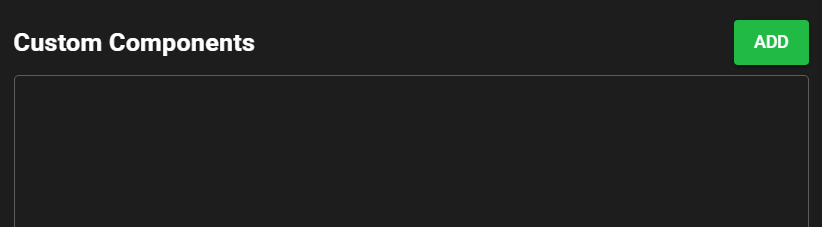
Press [Add] to register the so file for the custom component you have already built.
-
Press [Close].
-
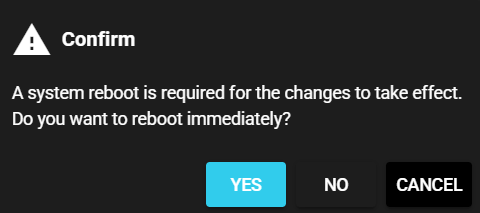
Select [Yes] in the confirmation dialog to restart the system to apply the changes.
-
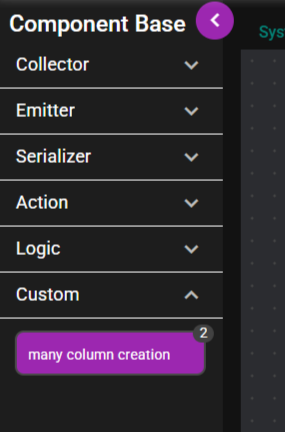
The left menu shows the registered custom component.
File Save Location
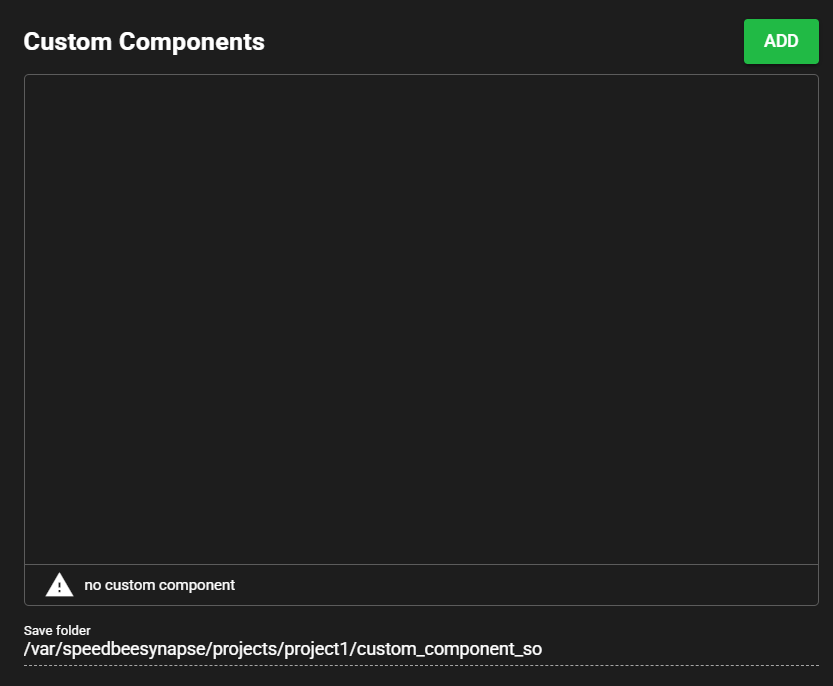
Registered custom component files are saved in the following directory:
/var/speedbeesynapse/custom_component_so
The save directory is displayed in the [Save Location] screen item.
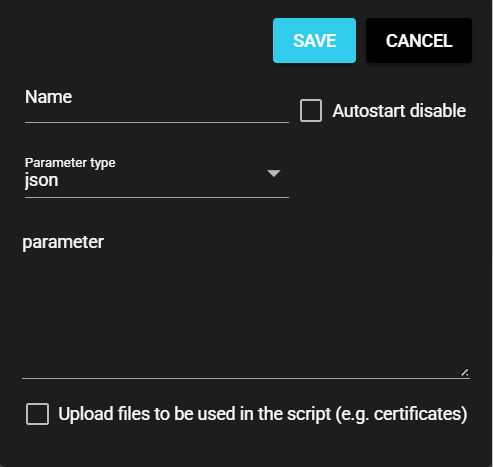
5.1.3.5.2 Settings Screen#
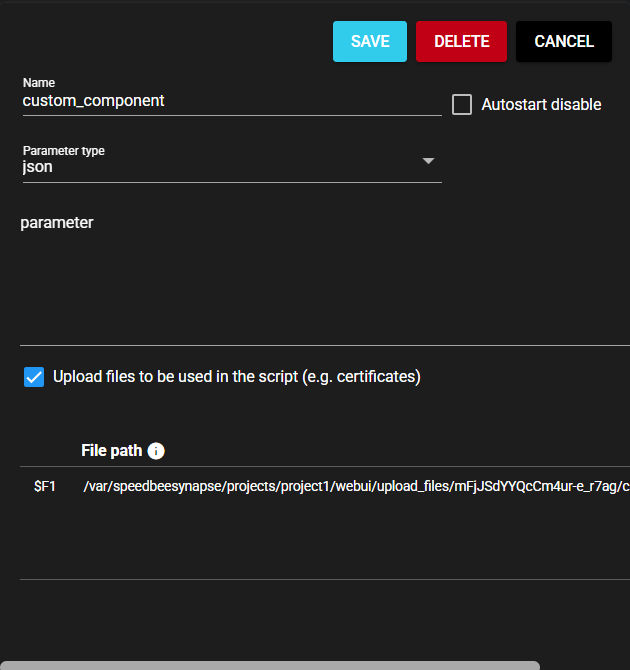
The items on the custom component settings screen are as follows.
| Item | Description |
|---|---|
| Name | Enter a name for the component. Note: Must be different from any other component name. |
| Autostart disable | Set to ON to disable the component’s Autostart. |
| Parameter type | Select a parameter type from the following: ・STRING: String ・JSON: JSON string |
| Parameter | Enter component parameters. |
| Upload files to be used in the script (e.g. certificates) | Set to ON to upload a file, such as a certificate, for use in custom component processing. |
| Add file | Press this button to upload the file to be used in the script. Note: Newly added files are uploaded when you save the component settings. |
| File path | Save location for uploaded files Note: When using a file path in a parameter, you can use a variable. For more information, click the icon to the right of [File Path] in the title. |
You can change the parameter input area of the settings screen to display the screen items defined by the user. For more information, see Creating Custom UI.
5.1.3.5.3 Delete#
You can delete a registered custom component from SpeeDBee Synapse using the following procedure.
-
Press the Setting Menu icon and choose [Custom Components].
-
Select [C(.so)] in the tab at the top of the dialog.
-
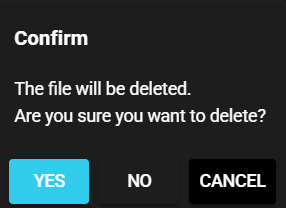
Press the trash can icon (Delete) for the custom component.

-
Select [Yes] in the confirmation dialog.
-
The custom component is deleted.
5.1.3.5.4 Download#
You can download a registered custom component as follows:
-
Press the Setting Menu icon and choose [Custom Components].
-
Select [C(.so)] in the tab at the top of the dialog.
-
Press the download icon (Get) for the custom component.
-
The custom component file is downloaded.
5.1.3.5.5 Protect#
Registered components can be protected.
Protected components are not subject to the following operations and therefore are protected from unintended updates:
You can protect a custom component using the following procedure.
-
Press the Setting Menu icon and choose [Custom Components].
-
Select [C(.so)] in the tab at the top of the dialog.
-
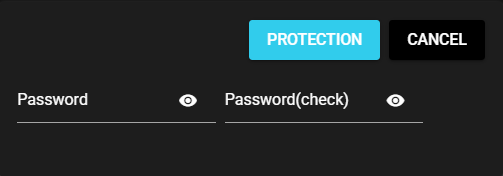
Press the key icon (Protect) for the custom component.
-
Enter the password required to remove protection and press [Protection].
Warning
- The password is stored in a undecodable format and cannot be reset until protection is removed.
- If you forget the password for protection, the protected custom component becomes inoperable.
Be careful when handling passwords.
-
The custom component is now protected.

5.1.3.5.6 Unprotect#
Follow the procedure below to remove the protection from a protected custom component:
-
Press the Setting Menu icon and choose [Custom Components].
-
Select [C(.so)] in the tab at the top of the dialog.
-
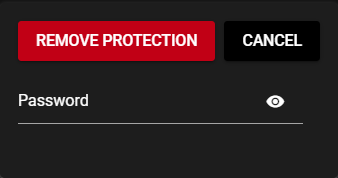
Press the key icon (Remove protection) for the custom component.
-
Enter the password set when applying protection and press [Remove protection].
-
The protection is removed from the custom component.